Broth and My Journey to Real Ramen
Having grown up in an Asian household, naturally I have eaten my fair share of plastic packet ramen noodles. In fact, I still enjoy them frequently today. However, it wasn’t until my post-grad backpacking trip to Japan in 2008 did I have the chance to taste what real ramen was. Ramen restaurants weren’t really a thing in the US midwest when I was growing up, so this was truly a new experience. Once that creamy, savory Japanese broth and noodle combo hit my tastebuds, it changed my life forever.
Fortunately, ramen shops have grown in popularity since then and it has become much easier to enjoy a properly prepared bowl. Since then I have sought out every opportunity I can to try a new ramen shop wherever I can, whether it be Ippudo and Momofuku in New York or Daikokuya and SIlverlake (one of my personal favorites) in LA.
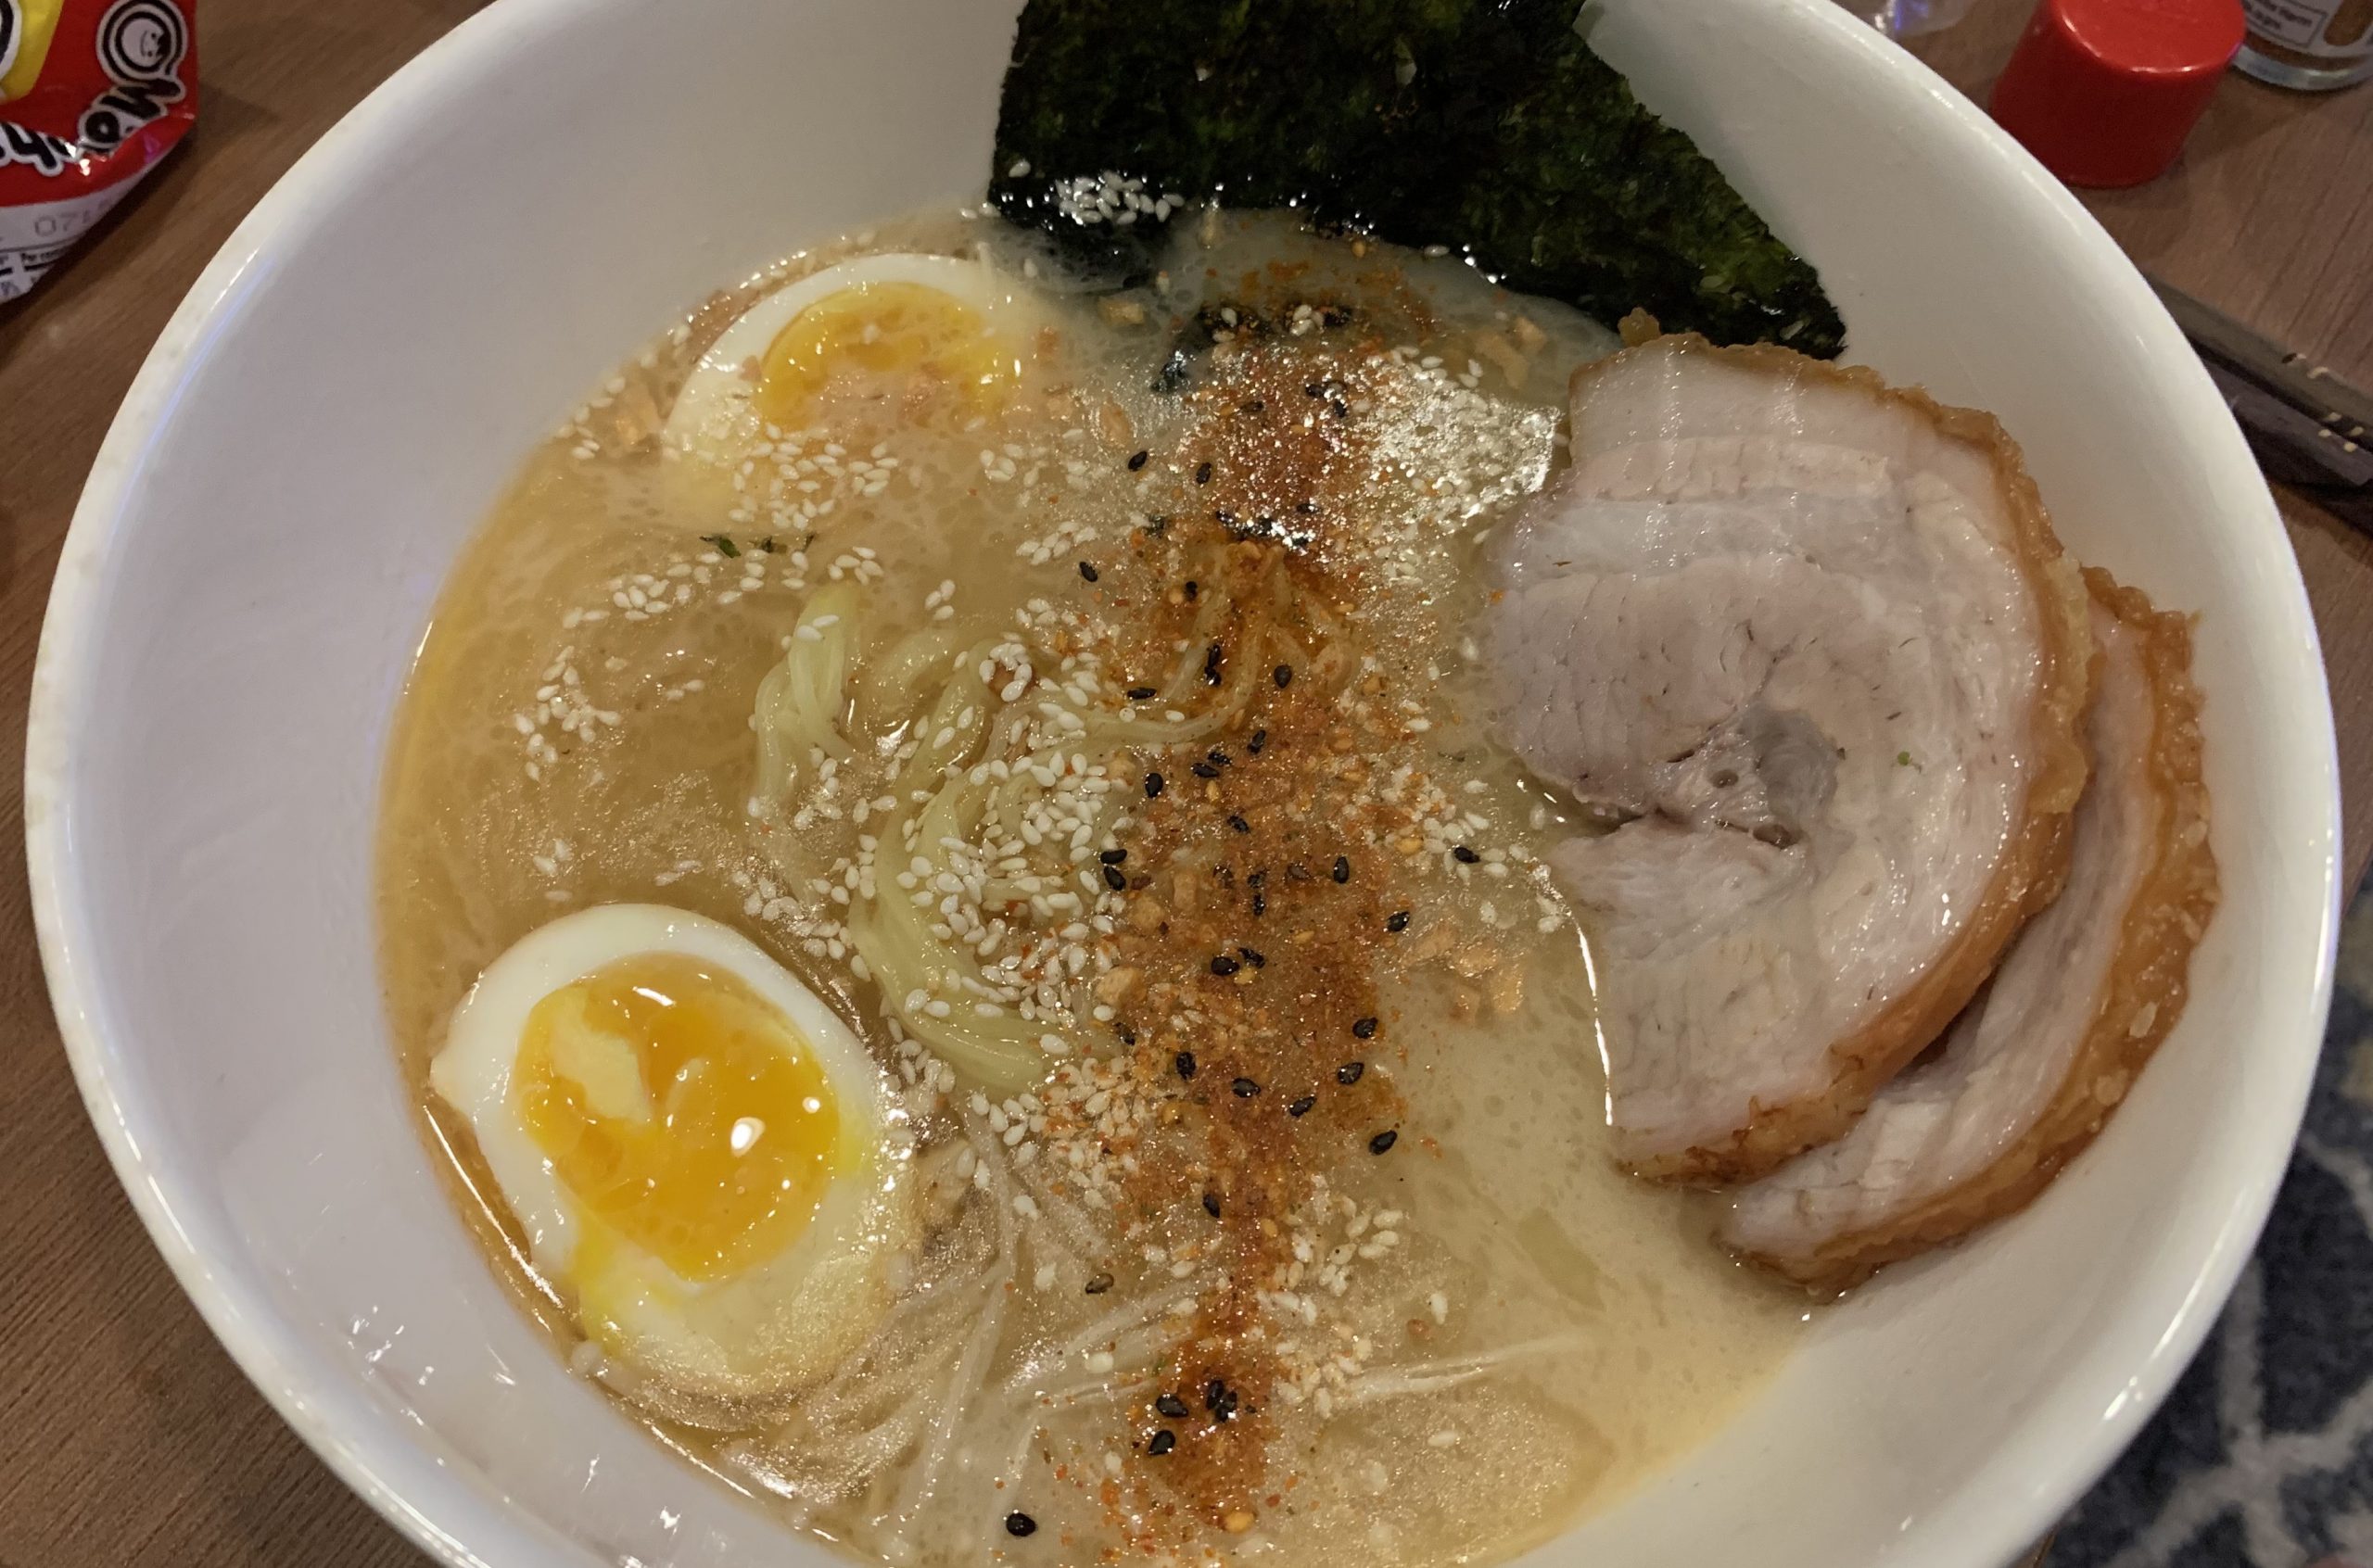
However, it was several years ago the budding home-chef in me decided to embark on the quest to make my own bowl of homemade ramen. Not just any ramen though, but one of the most popular & technically complicated of all: Tonkotsu Ramen.
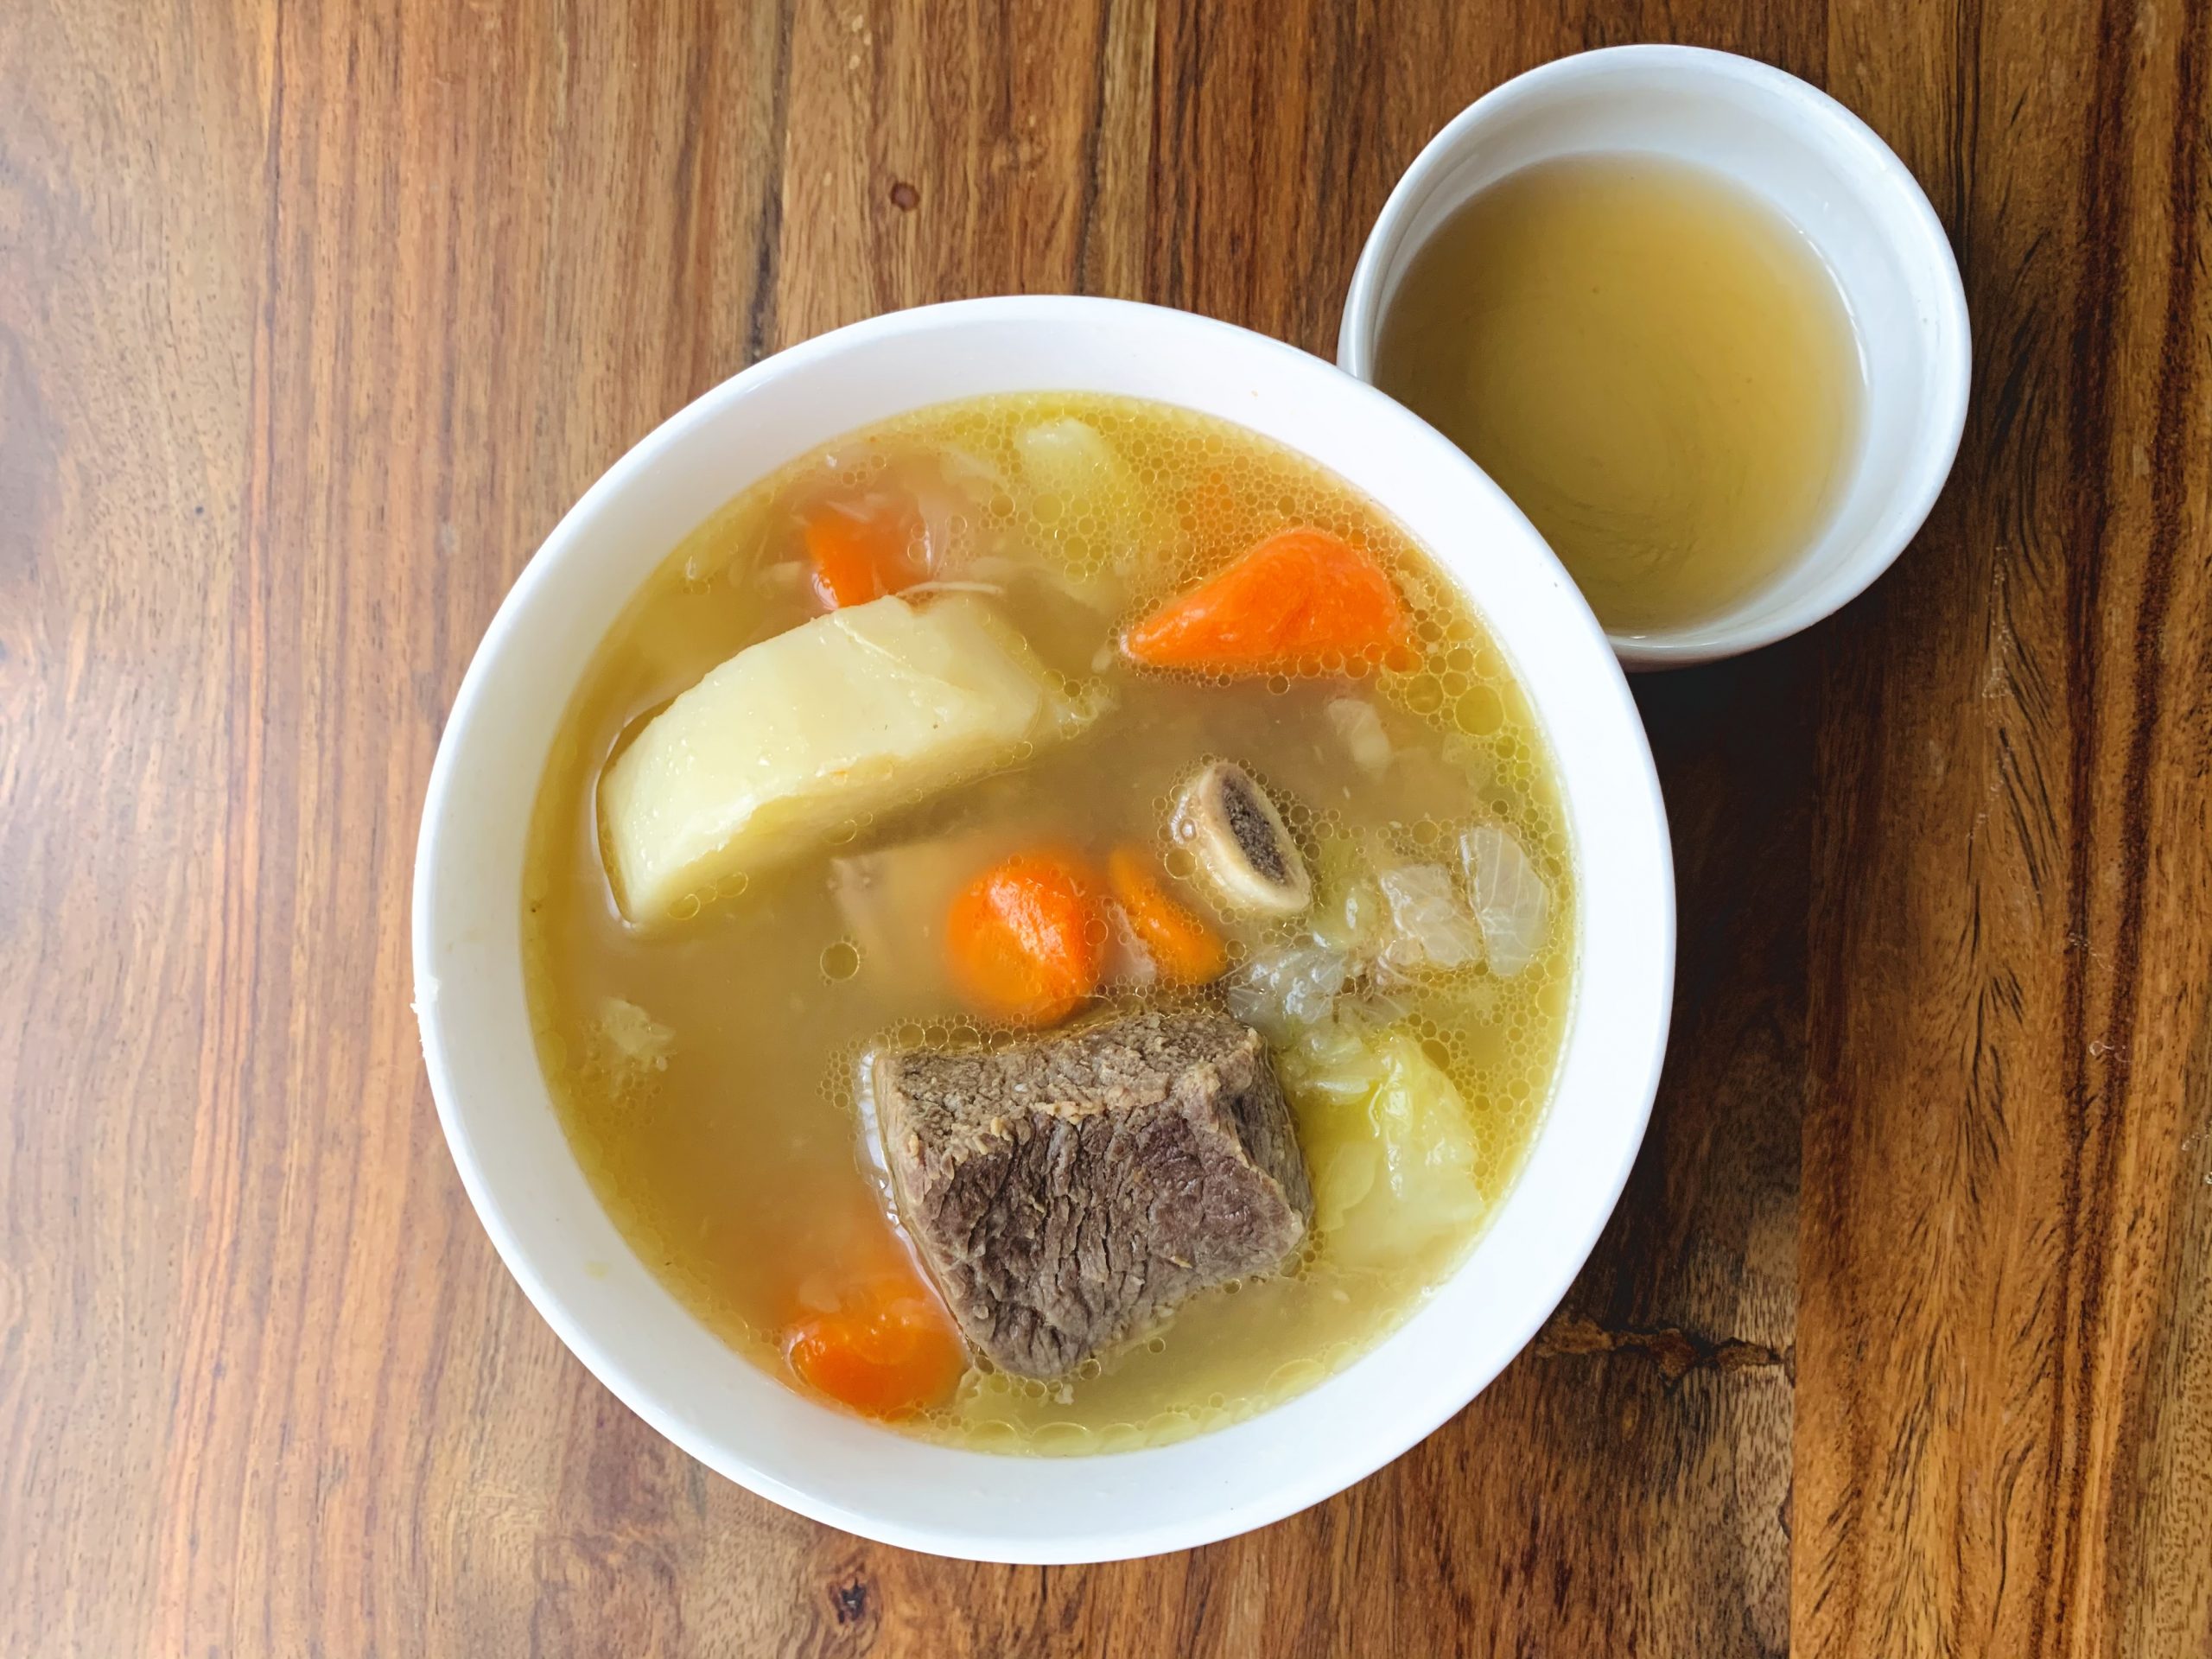
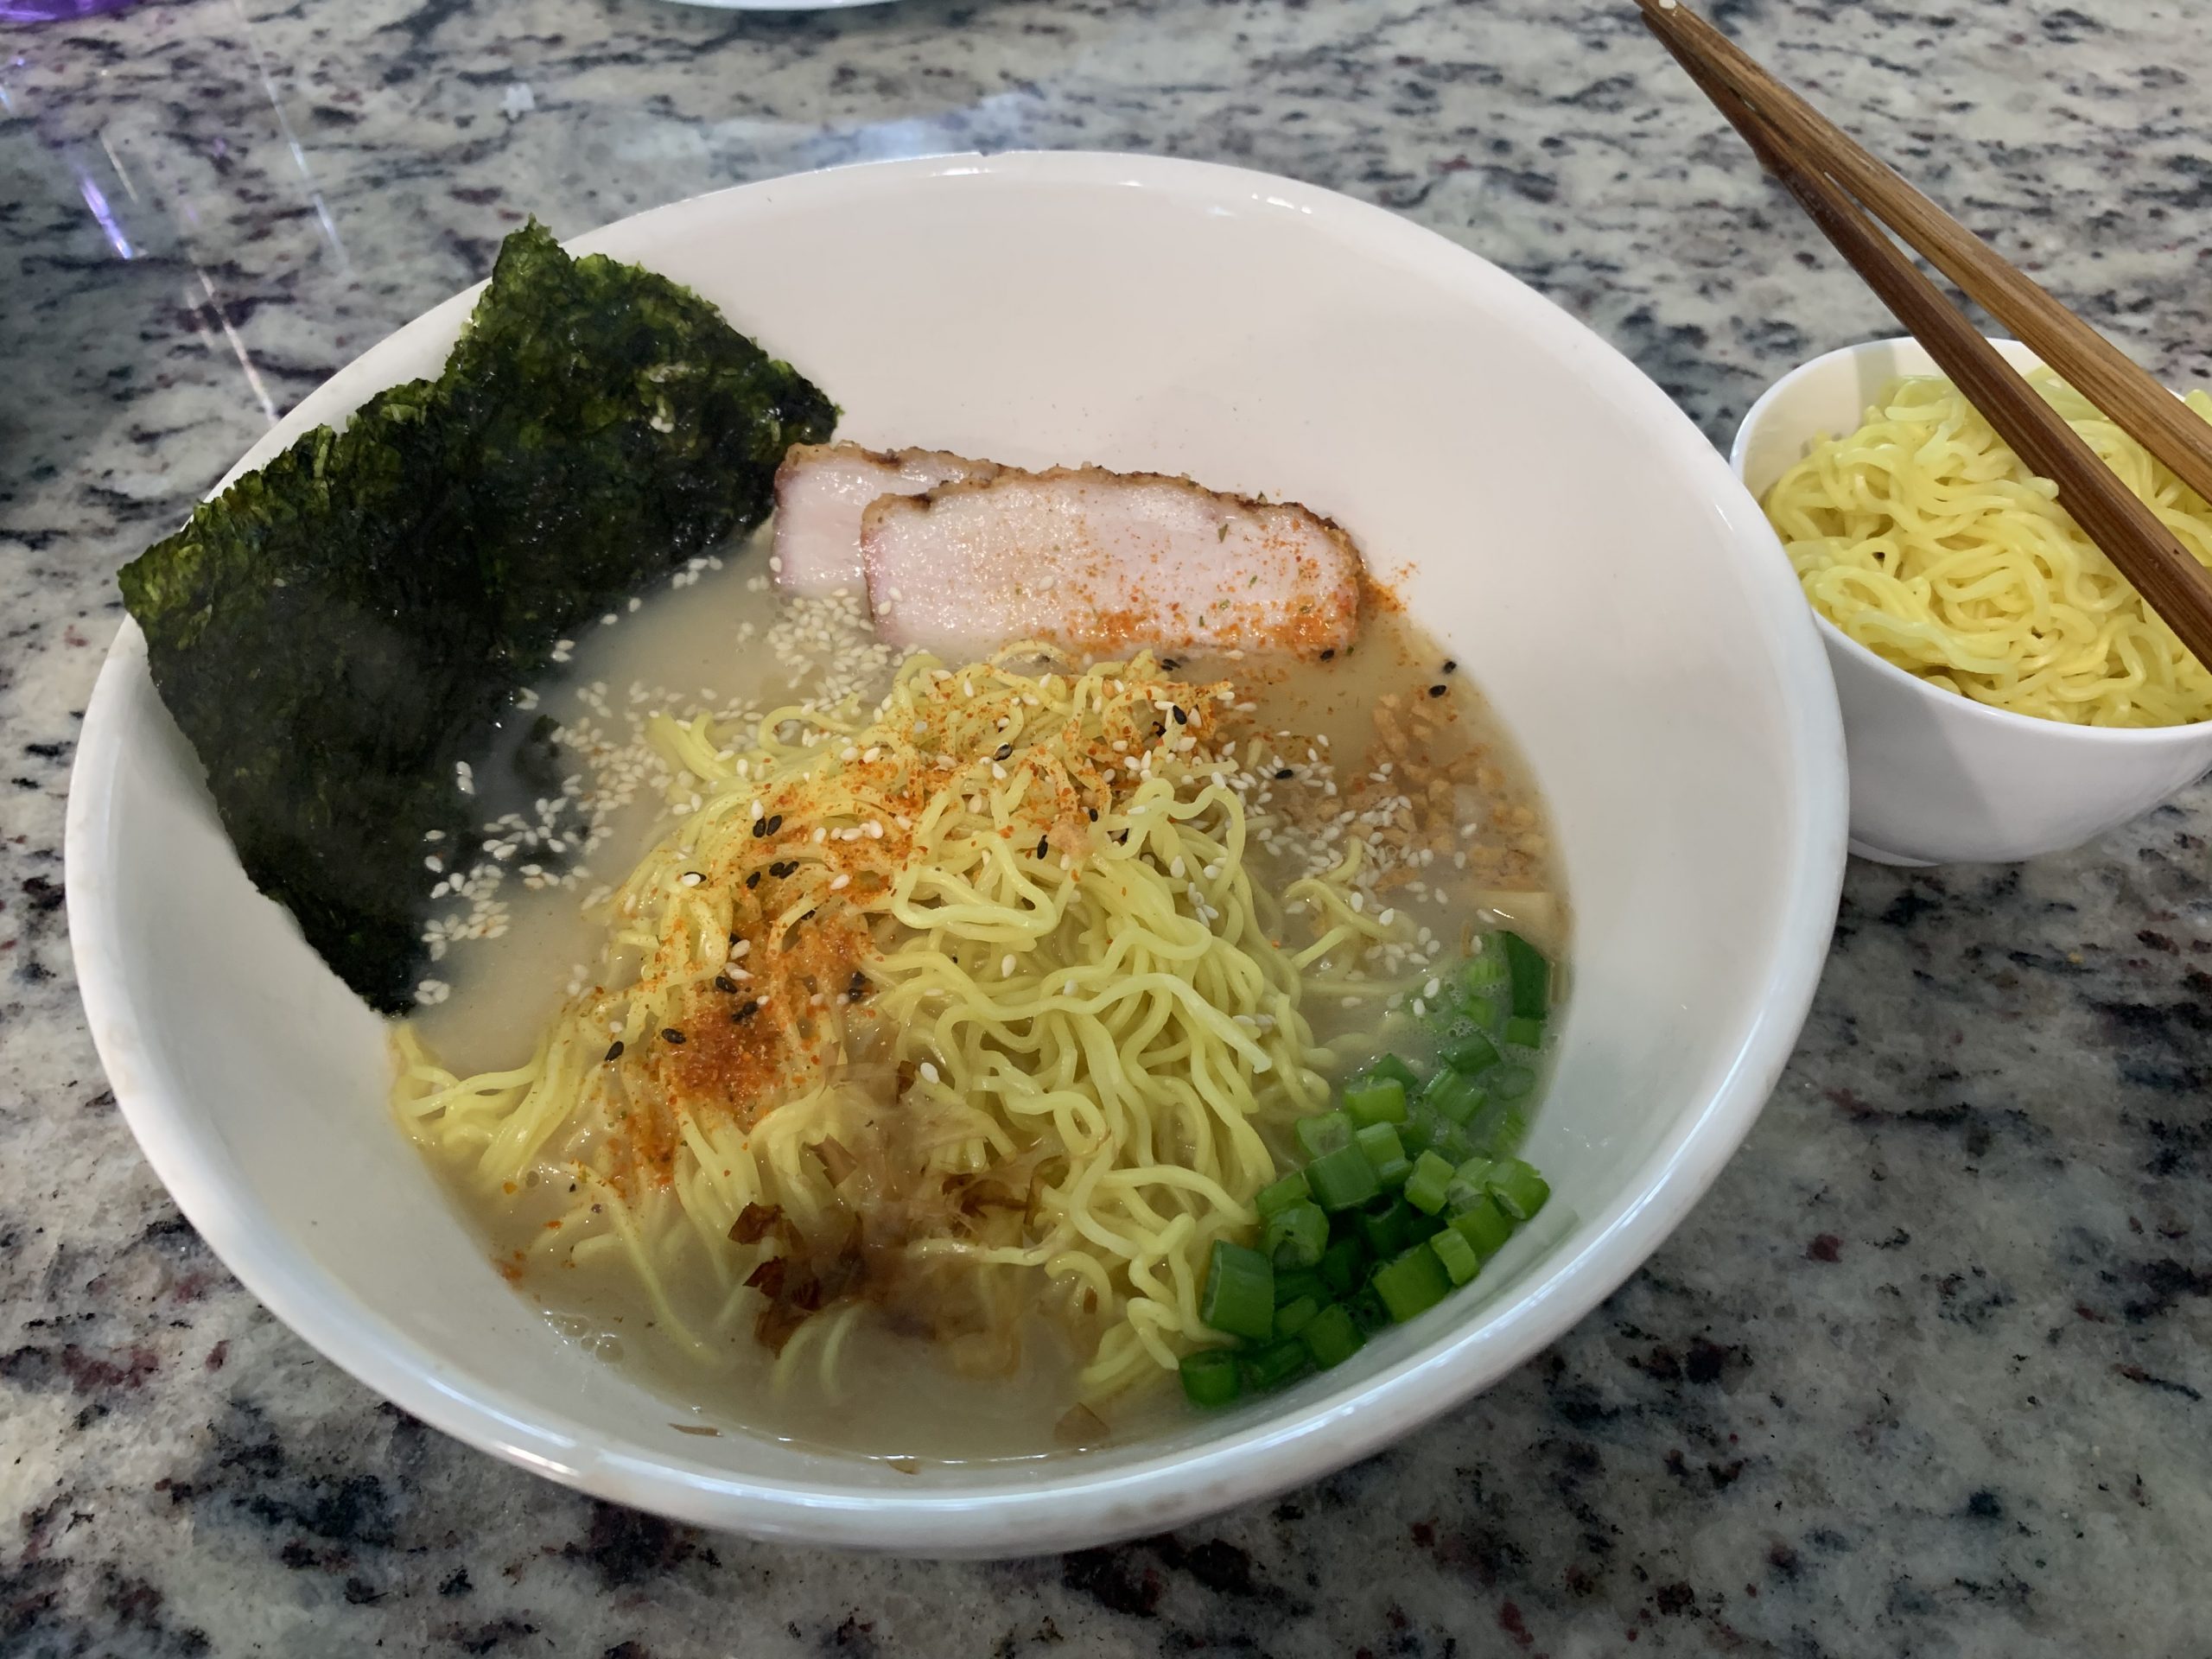
Tonkotsu ramen’s broth is a savory, creamy style pork-bone broth that gets its consistency from a long, rolling boil that breaks down pork bones to their basic elements. We are talking about a 12+ hour boil (some shops can go for days) to break down and extract all the flavor one can from the bones. Not to mention that it is traditionally topped with a delectable Japanese braised pork belly and other delicious toppings. However, it is the broth that gives it its signature name.
Soon to achieve making this broth became my holy grail. And like many home-chefs, to perfect it became my white whale. I wasn’t going to stop until I could get it just right. I have spent countless hours to what literally amounts to several days boiling, learning, tweaking, and finally perfecting until I got to something that was, what I think, is now my best broth. This is that recipe.
A disclaimer
I have only scratched the surface of my ramenology and I admit I have plenty to learn. What I am not claiming to be is an expert in this craft. In Japan, it can truly be artisan. So forgive any wrong terminology, technique, or anything that may appear remotely disrespectful to the culture in this series. This is just what I picked up along the way. Rest assured I highly respect this craft.
A word of encouragement to the novice
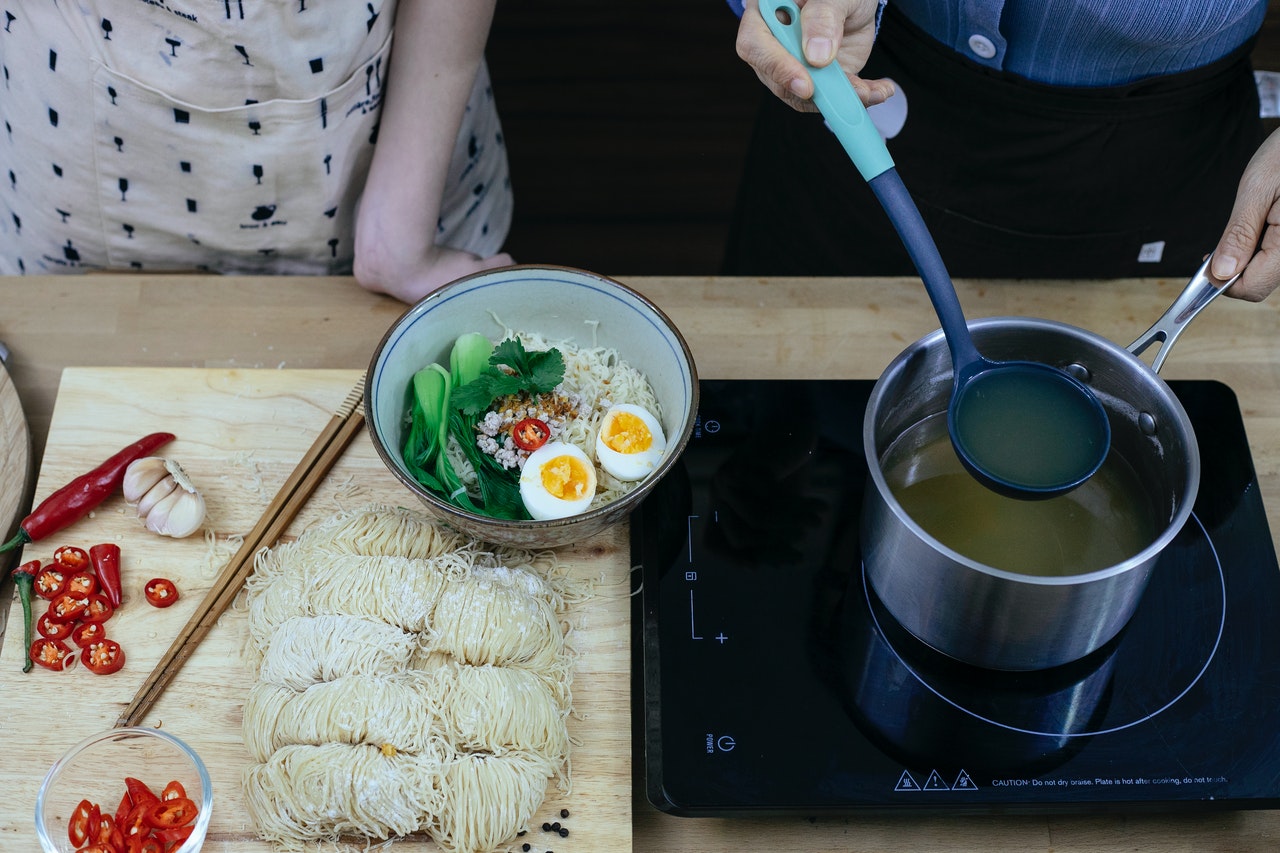
Before you continue, I want to be clear about a few things. Broth is just one part of ramen and, if you look at it like that, it can be a relatively straight-forward task. Do not let 12 hours of boiling discourage you because much of it is really waiting and watching. Ramen has several more components to broth which make this dish complex: noodles, tare (flavor base), aromatic oil, and a long list of possible toppings (soy eggs, braised pork belly, etc…). This recipe focuses on the very important component of broth, which to me is the soul of your soup. To read more about the other components in building your ramen bowl, check out future chapters in my ramen journey.
Tonkotsu Requires Some Planning
To get started you will need some real equipment. You can embark on this 12 hour journey with substitutes like a smaller stock pot or a colander to strain, but it may make it more difficult. But if you’re in it for the long haul, you may as well invest in the right gear to maximize the quality and amount of broth you can get out of the boil.
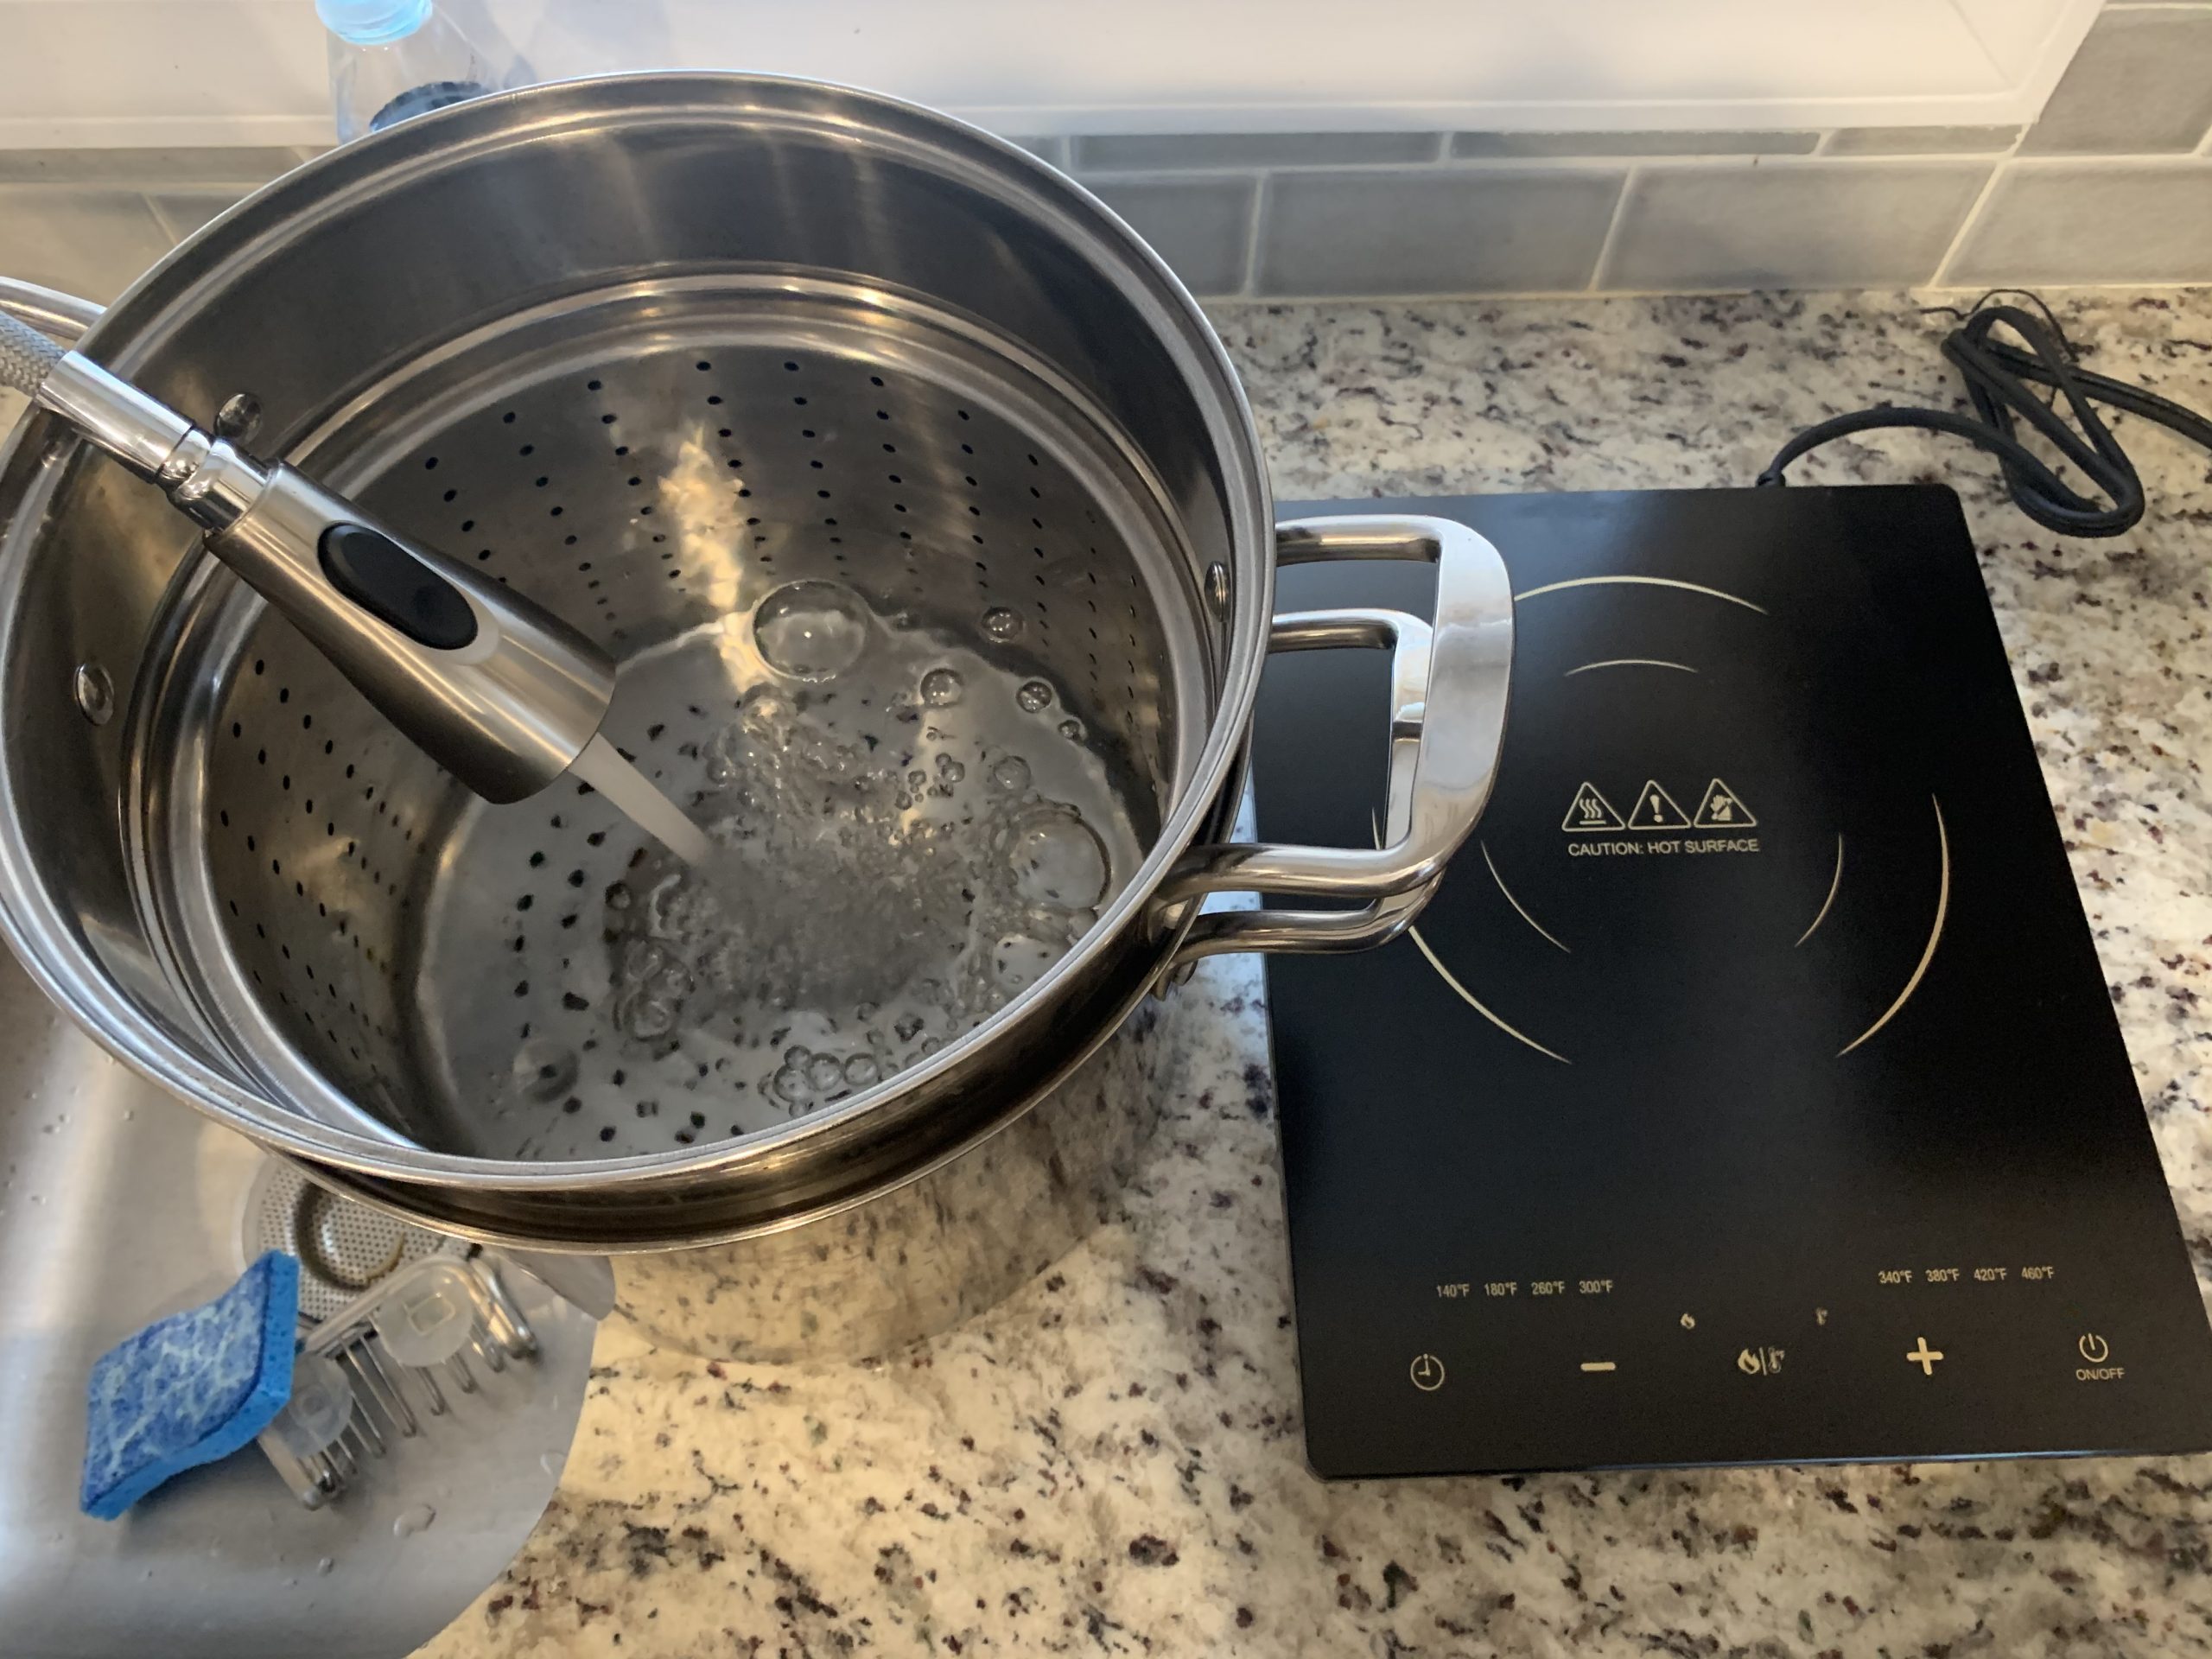
Pro tip: I strongly recommend an induction burner. Zero flame greatly minimizes any risk of fire, it is a nominal electricity cost, and it is portable if you do need to cook this outside. There is also no excess heat since there is no flame and the burner uses electromagnets to heat your pot directly, not the air around it. I received a Bonsen Induction Cooktop for Christmas this year which I used to make my latest batch of Tonkotsu. It was the first time I made broth off a stove and I don’t think I’ll ever go back to making a long boil broth without one.
A stove top is not out of the question but keep in mind it is 12 hours worth of natural gas. There is obviously risk with fire, and if you’re not watching the boil (say overnight when sleeping) something could happen. Same with a propane burner, which I would recommend using outside anyway. Again, it’s not impossible, just be prepared to check on it often and never leave your flame alone for extremely long, extended periods.
The Equipment
- Very Large Stock Pot with lid (recommend induction friendly)
- Long stir or Soup Ladle
- Long Tongs
- Stove / Induction Burner / Propane burner
- Large Steel Mesh Sieve (preferably with handle and/or that can rest on a large bowl or pot)
- A secondary, smaller stock pot (standard size)
- Several Large mixing bowls (2-3) – preferably one bowl deep enough to rest a stock pot in or rest on with its handles
- Optional containers to store broth for freezing
Ingredients
- 2-3 lbs pork leg bones
- 1-2 lbs pork neck bones
- 1-2 onion peeled
- 5-6 stalks of green onion (chop the greens for garnish, use the whites in the broth)
- 15 cloves of garlic (I buy jars of pre-peeled at the Korean-mart)
- 3 inch knob of ginger
- 3 oz Shitake mushrooms
- Heaps of water (to wash, fill and refill)
Tonkotsu Broth in 5 Steps
1. Soak or wash your bones
The beauty of Tonkotsu broth is its creamy white look and texture. The way you get this white color is by making sure you remove all traces of blood, protein, marroy, myoglobin, and other impurities that will eventually cloud up your broth and give it a brown color in the end. There are generally two ways to do this.
- Soak your bones in a large stock pot filled with water overnight. Make sure the bones are completely submerged and keep it in the refrigerator for at least 24 hours. Much of the gunk will exit the bones overnight and collect in the water bath. You can remove the bones (or dump the water) and set them in a colander to rinse one last time and to clean your stock pot. Once rinsed and cleaned, you’re ready to boil. Although bit of a wait, it’s a little less work versus the alternative below.
- The second option is you can do an initial boil to flush out the impurities from your bones. This step does not make you wait 24 hours but can be a little more cumbersome than the above. Simply place all your bones in the stock pot and cover completely with water. Bring the water to a boil and let boil for about 10 minutes. During the boil, you will want to periodically skim the gunk collecting at the top of the water with a spoon and discard. Stir the bones once or twice and skim the water a few times until there’s nearly nothing left to skim. You will want to dump out the water and bones into a colander to cool and clean out the stock pot before using again. When the bones are cool enough to touch I recommend one good rinse under a faucet for each bone individually. You will want to try and clean each bone well so use a spoon or chopsticks to scrape off any last bits of gunk outside and inside the bone if you can. Do your best, then you’re ready to boil.
2. Boil the clean bones

At this point you will want to fill your stock pot back with all the bones and fill with enough water to cover the top of the bones. I have a deep stock pot and I like to fill the water up to about 3-4 inches below the rim of the pot, even if the bones only go about half way up. Given the long boiling process you will find yourself refilling the water periodically anyway to maintain submersion of the bones even if you are boiling with a lid.
Now you can fire up your stove or induction top and bring the water to a rolling boil. You’re not simply looking for an occasional bubble, but you’ll want the boil to keep a good tempo throughout the process. This might require a medium-high heat on a stove or anything above a 212 degree setting on an induction cooktop.
As I mentioned earlier, a few reasons I love using my Bonsen Induction cooktop to do this step is because there was no flame and no residual heat. Another reason is safety. 12 hours of monitoring a boiling pot is not easy, but you’re a lot less anxious when it’s done on an induction cooktop versus a stove because you’re not worrying about a potential buble over turning into a fire. Not everyone has one, but if you’re looking to invest in ramen making equipment this is one any home chef should have.
3. Add the aromatics & refill often
This next step is probably one that varies by chef (or maybe there is a traditional way to do this – I don’t know). When it comes to aromatics of your broth, you can choose to add your flavor to the soup by directly infusing things like onion, scallions, and ginger during the boiling process. Alternatively, some opt to create aromatic infused oil to use as a topping during the plating process. I do both.
In all my broths I have gone for infusing aromatics during the boiling process as I like to take advantage of 12+ hours of flavor infusion. I’ve tried variations of vegetables like charred and uncharred onion & scallion tips, ginger or no ginger, different mushrooms, etc. And while non-traditional, in the past I’ve even added a small slab of pork belly bacon to braise in the broth for extra flavor. Either way, you can go a variety of ways in this step and get creative depending on what flavor you want to achieve. Personally, I find this to be one of the fun aspects of broth making where you can really make it your own signature flavor.
In this recipe I like having notes of green onion and garlic so I try to over emphasize that by adding a bit more than I need. But I also keep the common ingredients in like 1-2 whole peeled onion, a knob of sliced ginger and shitake mushrooms. Add these in (or whatever aromatics you like) at the start of the boiling process and you’re set. Midway through the process I like to even give it a little taste. The broth may not be as thick or extracted as it will be at the end, but you can get a sense of the flavor notes and adjust as needed.
On refills, you’re basically monitoring to ensure your bones are still under the boiling water line throughout the process. At this stage you are simply trying to extract all the good bone flavor from the pork bones by keeping it at a constant boil. Eventually you will stop and reduce the whole thing to concentrate flavor, but in the meantime, just continue to add more to the original water line. Having a lid on top vs not helps minimize frequency of having to add water to the pot, so I recommend using one if you can. Don’t get intimated if the lids start to rumble on your pot due to the constant generation of steam. That sound means it’s working. If you like, keep the lid off enough to let the steam out, but know you will probably have to refill more often.
4. Reduce your broth
When you have decided the broth has boiled long enough — or simply given up patience — it is time to stop refilling your pot with water and allowing the broth to reduce to a more concentrated goodness.
Throughout the “refill” process I like to take some time to monitor how fast the water tends to boil off and reduce. It could differ by scenario (high/medium heat, lid/no lid, size of pot, etc…) so I suggest paying attention to the first few times you have to go and refill. That is because in this step you’ll want to know how fast your water level is going down.
I usually check my broth every 15 minutes at this stage to check on the progress of the reduction. If I have a large stock pot and I know my bones have piled up about ¼ of the way, I will reduce the water down to a little over about ½ of the stock pot, knowing that a majority of the volume below is going to be the bones I remove.
This step also requires an element of preference, so practice will make perfect and you’ll get it over time. What you don’t want is a watery broth like the consistency immediately after refilling your pot. Over time you will see how the collagen in the bones has thickened the broth and as you reduce, take out a ladle of broth and pour it back into the pot. You want a creamy sort of texture, not watery.
5. Strain your soup
This final step requires a little preparation as you’ll be dealing with a large pot of boiling hot water filled with piping hot bones. You’ll want your conditions to be just right so you don’t hurt yourself or jeopardize the flavor of the broth. I do this by layout out a layered set of equipment in the sink consisting of (from bottom to top) a deep mixing bowl, a stock pot, and a mesh sieve.
The next steps will depend on if you are serving your broth immediately, or saving it to serve for later. Here are 3 options.
Soup for now:
- You can ladle the soup our bowl by bowl and use a mesh sieve to filter out any bits of meat or bone that might get into your soup. You want to eat a clean broth and doing it this way keeps it clean, but also ensures your soup is piping hot if you’re serving immediately off the stove.
- You can strain all the broth at once into another pot and keep the soup warm on your stove to serve. Also a good way to keep it hot and fresh. If you prefer this route, follow the instructions below and skip the ice bath.
Soup for later:
- If you are storing your soup for later, one critical thing you want to do is strain your soup but also bring the temperature down to under 40 degrees as soon as possible to stop any growth of bacteria that might impact the flavor of your soup down the line. The “danger zone” for bacteria growth in food is maxed between 40-140 degrees. Using an ice bath like in the method below can help bring down the temp more quickly and make your soup ready to store immediately.
You will want to start by making the ice bath. First, find another standard stock pot. It is okay if you use a smaller one this time because you’ll be dealing with a reduced volume and ultimately no volume from the bones. You’ll then want to take a deep mixing bowl and rest the stock pot in it so at least ¼ to ½ of the pot is below the edge of the bowl. I have a small stock pot that has 2 side handles which rests nicely on the rim of my largest mixing bowl, keeping the bottom portion below the line. Once you find a pair that fit, fill the mixing bowl with ice water and set in the sink. Then place the stock pot back in the bowl and either rest it on the sides of the bowl with the pot’s handles, or let it sit and float in the ice bath. Just make sure if it floats there is no risk of it sinking below the water line and getting ice water into your pot. Once your pot is settled, rest a sieve on the stock pot until you’re ready to pour.
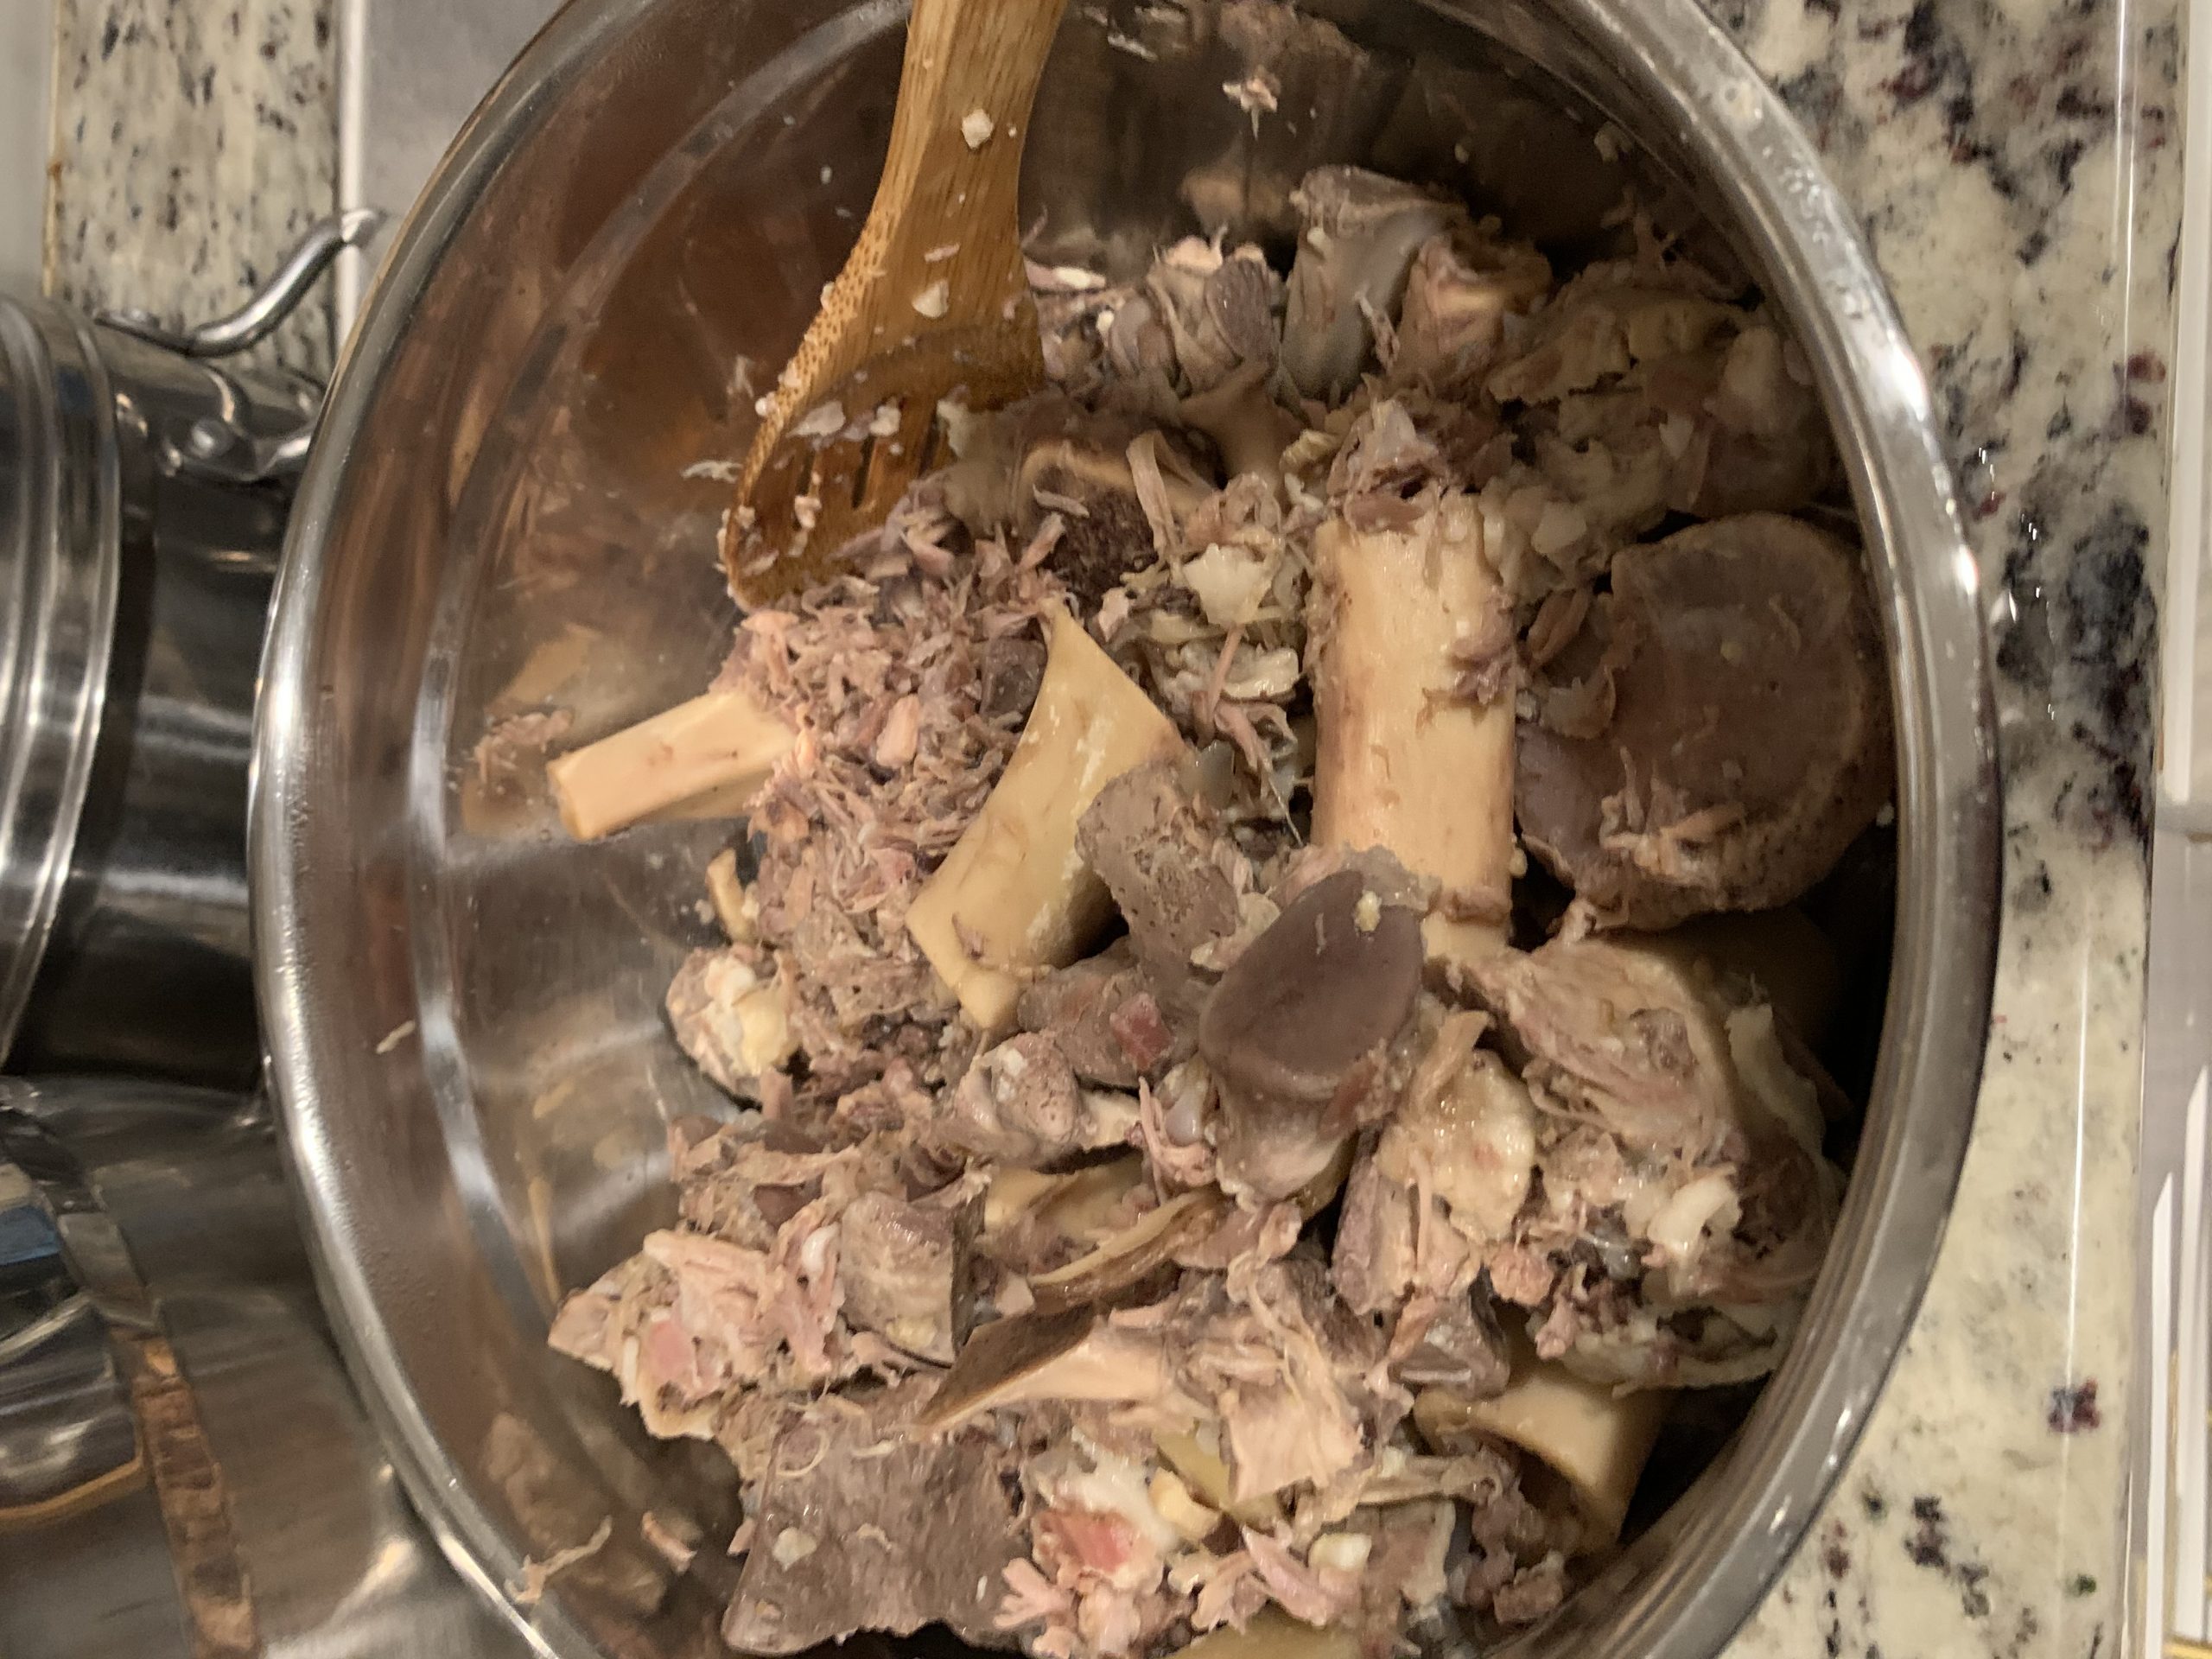
I like to manually remove some of the larger bones from the pot and setting them aside by using a long kitchen or BBQ tongs to pick them out. Just take them out and set them to the side or – depending on how big your strainer is – let them drip their liquid through the sieve. Once I get all the big bones out, I ladle the broth through the sieve until I get down to a manageable amount where I can safely lift the pot and pour the remaining broth out over the strainer.
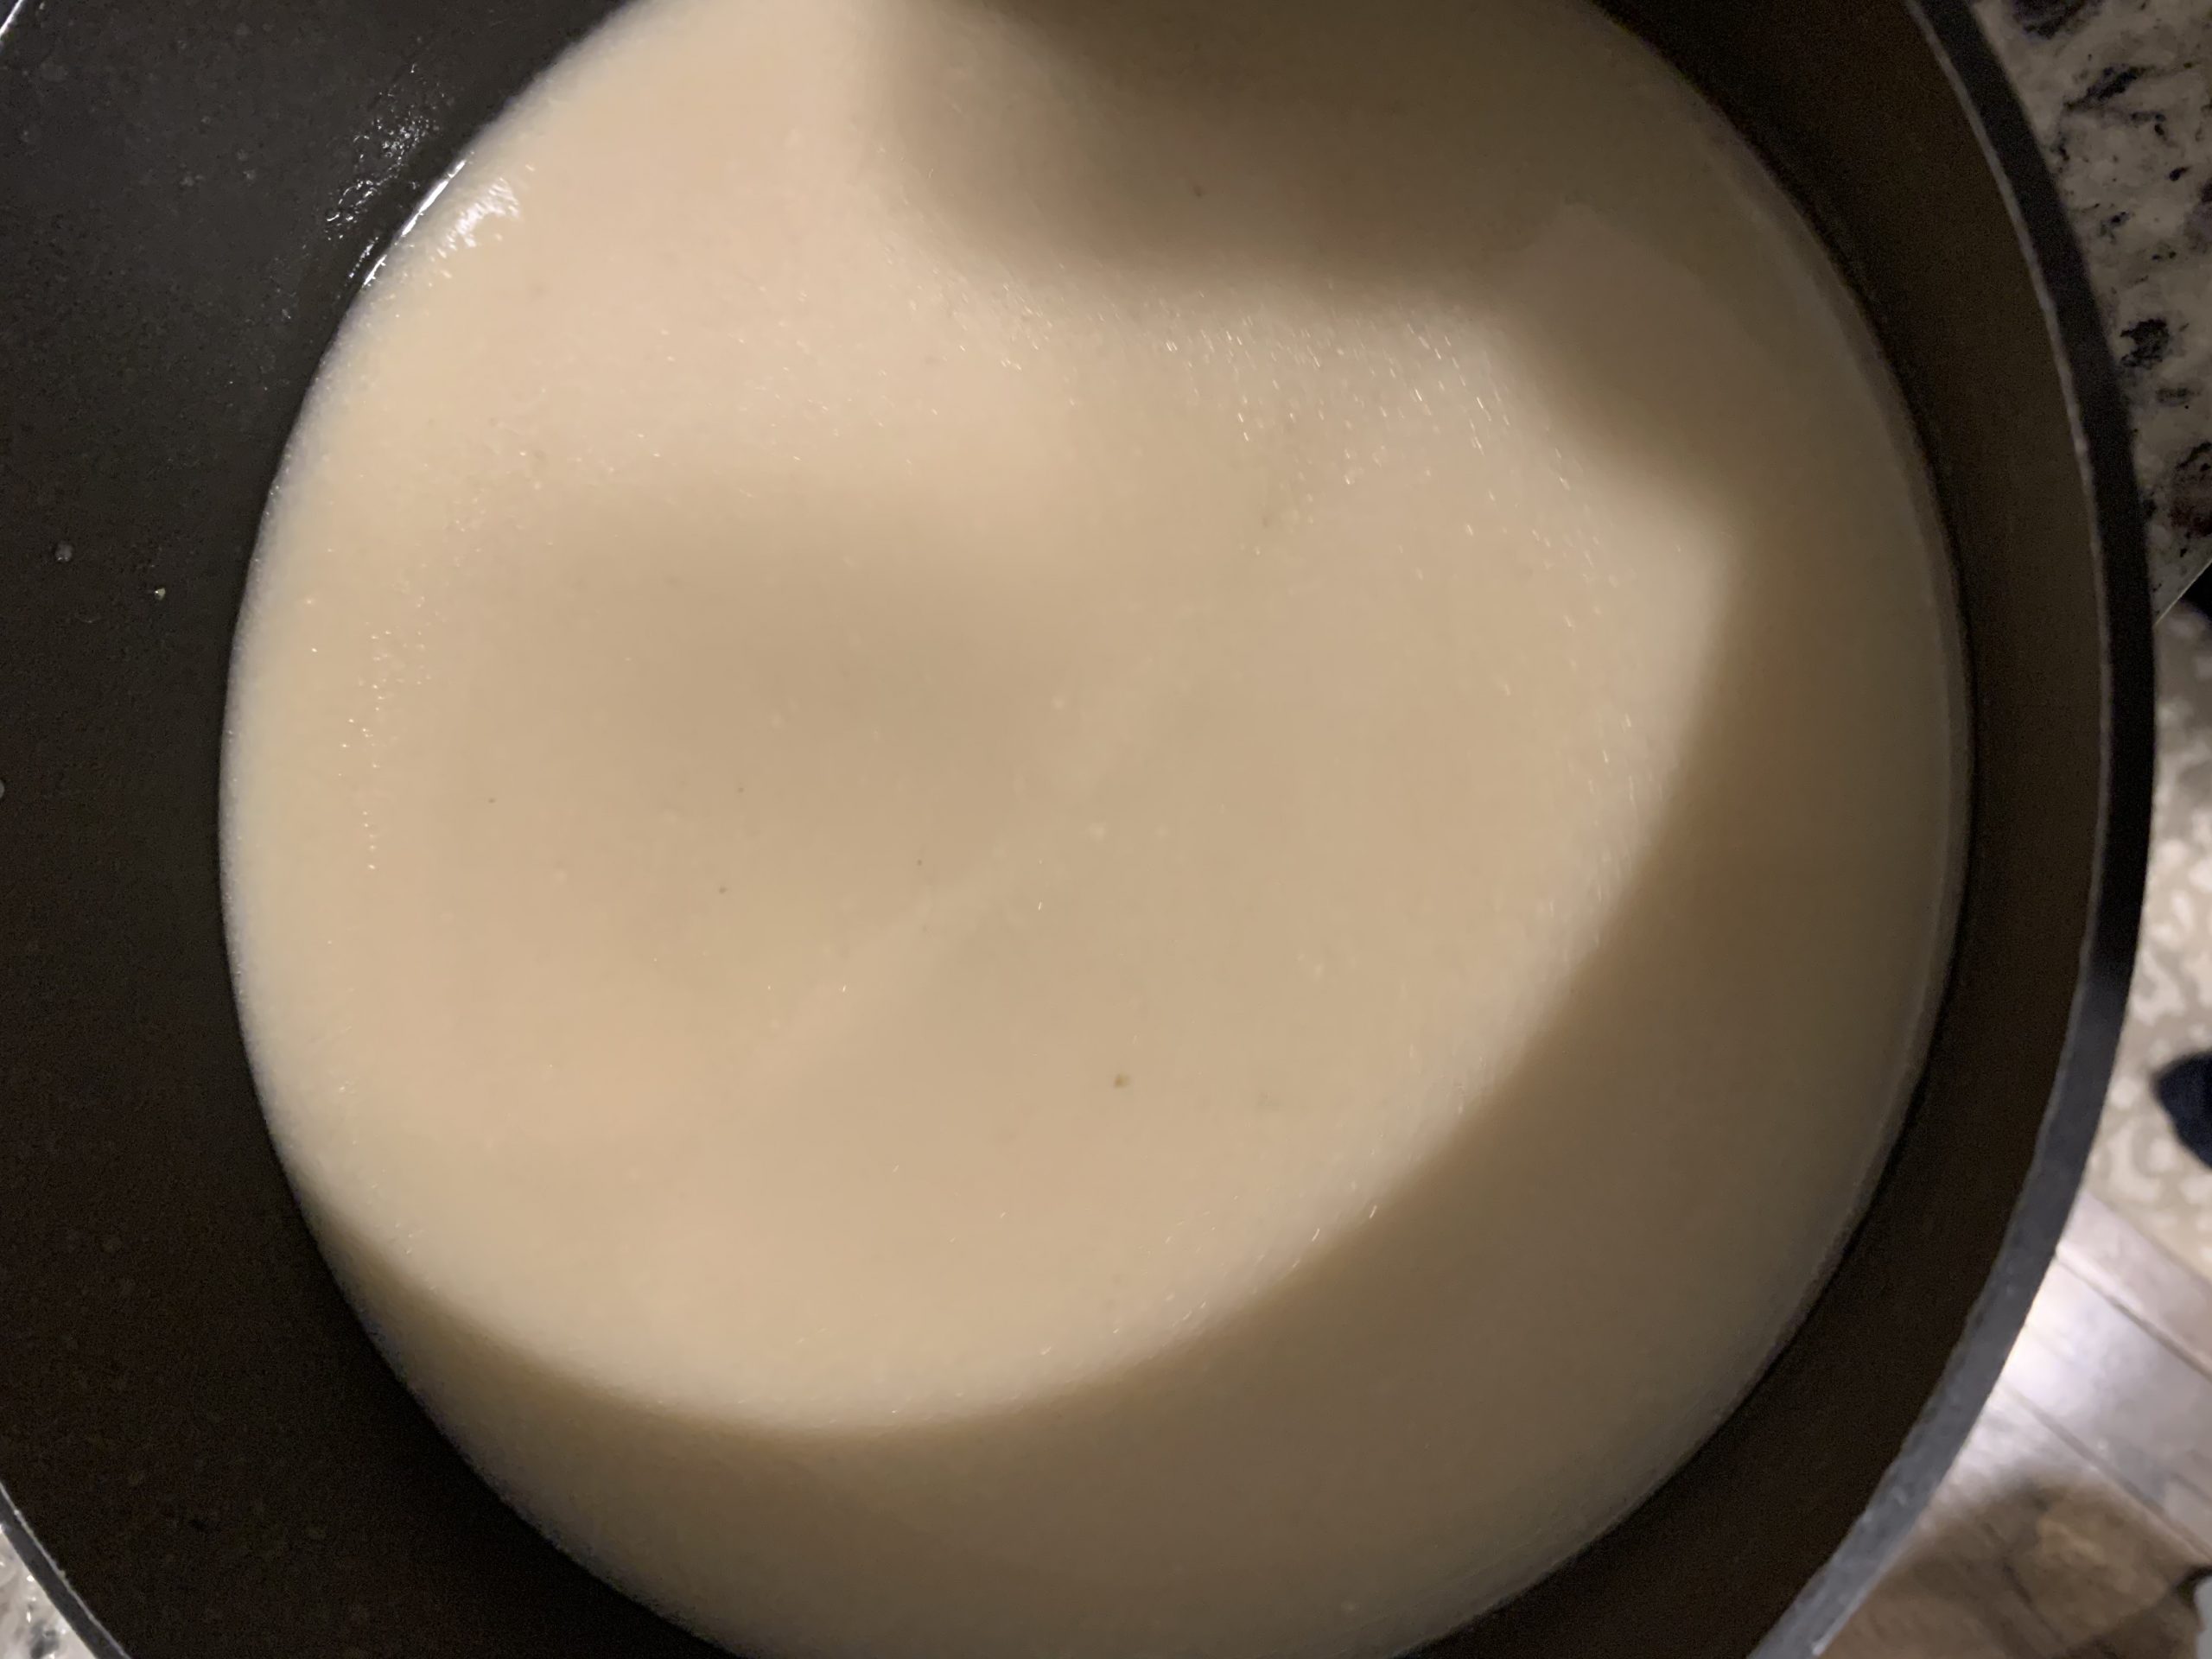
At this point I remove the remnants and sieve from the pot, give the broth a good stir to cool it in the ice bath, and can store it as I please. You can store portions out into storing bowls (leftover Chinese restaurant soup containers work amazing! to freeze, but what I like to do first is chill the whole thing in the fridge first. After a few hours you end up with that thick, collagen/gelatin like soup that is a little easier to portion out into containers for saving.
My final thoughts on broth – Seasoning: to salt or not to salt?
When it comes to flavoring your broth there are a few approaches one can take. Some make a dashi out of kombu (dried kelp) and katsuobushi (dried bonito flakes) and portion into individual bowls to add flavor to a bowl’s broth. Some flavor using something called a tare, which is a base of flavors (soy, umami, fish, etc…) you can add to a bowl to give it its essence. Many of these have some element of flavor enhancement which ultimately begins with salt.
A few common ramen seasoning types include shio (sea salt), shoyu (Japanese soy sauce), and miso (miso/fermented soybean paste). I think when it comes to the latter two, I prefer to save this for plating. This way I can control the salt contribution of the soy or miso without accidentally tainting the whole batch. Soy and miso come with so much more than just saltiness. There is a complex balance of flavor you need to account for when pairing with your Tonkotsu broth. To be safe, do it by the bowl or small batches.
That’s not to say with sea salt you can’t control it when you’re preparing a meal, but with sea salt you do have the option (and I think a little more control of the saltiness) to add during the cooking phase and more accurately adjust the taste without risk of adding any other flavor component as in soy or miso. There is also an element of control when serving too. In my case, I made a batch of ramen broth I was going to share with my friends so I pre-salted the broth to what I thought was the right shio saltiness, taking care of the need for them to do so themselves or worse, forget to salt it at all. There is a lot of flavor in this broth but it has to be unlocked the right way. No salt, no bueno.
I hope you enjoyed this guide to making Tonkotsu broth. I believe if you have the guts to tackle this phase of ramen making with Tonkotsu, you can handle many of the other types of broth bases without a problem. In my book, Tonkotsu is the cream of the crop and one of the tastiest types of broth I have ever tasted. For any home chef, the time and effort you put into this recipe will make you proud you stuck with it for so long and add another several pages to your repertoire of techniques. Bon appetit and good luck.
To learn more about the other elements that make up ramen, keep an eye out for the other parts of my ramen guide like “Making your own ramen noodles” and “Let’s talk toppings”.
Slurps up!