There is nothing I love better than a tangy hot sauce on hand to add some kick to BBQ, add some heat to a salsa, or just smother on my fried eggs. This simple habanero garlic hot sauce recipe has all the delicious flavor of habanero paired with the always satisfying taste of garlic and, in my opinion, half the heat so you can enjoy the symphony of flavors without burning off your tongue.
This was also one of my first attempts at making a fermented hot sauce and I’ve learned so much from this process. It took me 1-2 batches to get used to the process, but once you get the basics of doing a fermented hot sauce, you’ll just want to keep exploring the endless possibilities of flavors and combinations. If this is your first time, welcome to your gateway into the world of fermented hot sauce.
Instructions
Preparing the Peppers for Fermenting
- Wash the jars with soap and water and fully dry. Rinse the habaneros under water in a bowl or colander. No need to scrub, but make sure you pick out any habaneros that show signs of aging or mold.
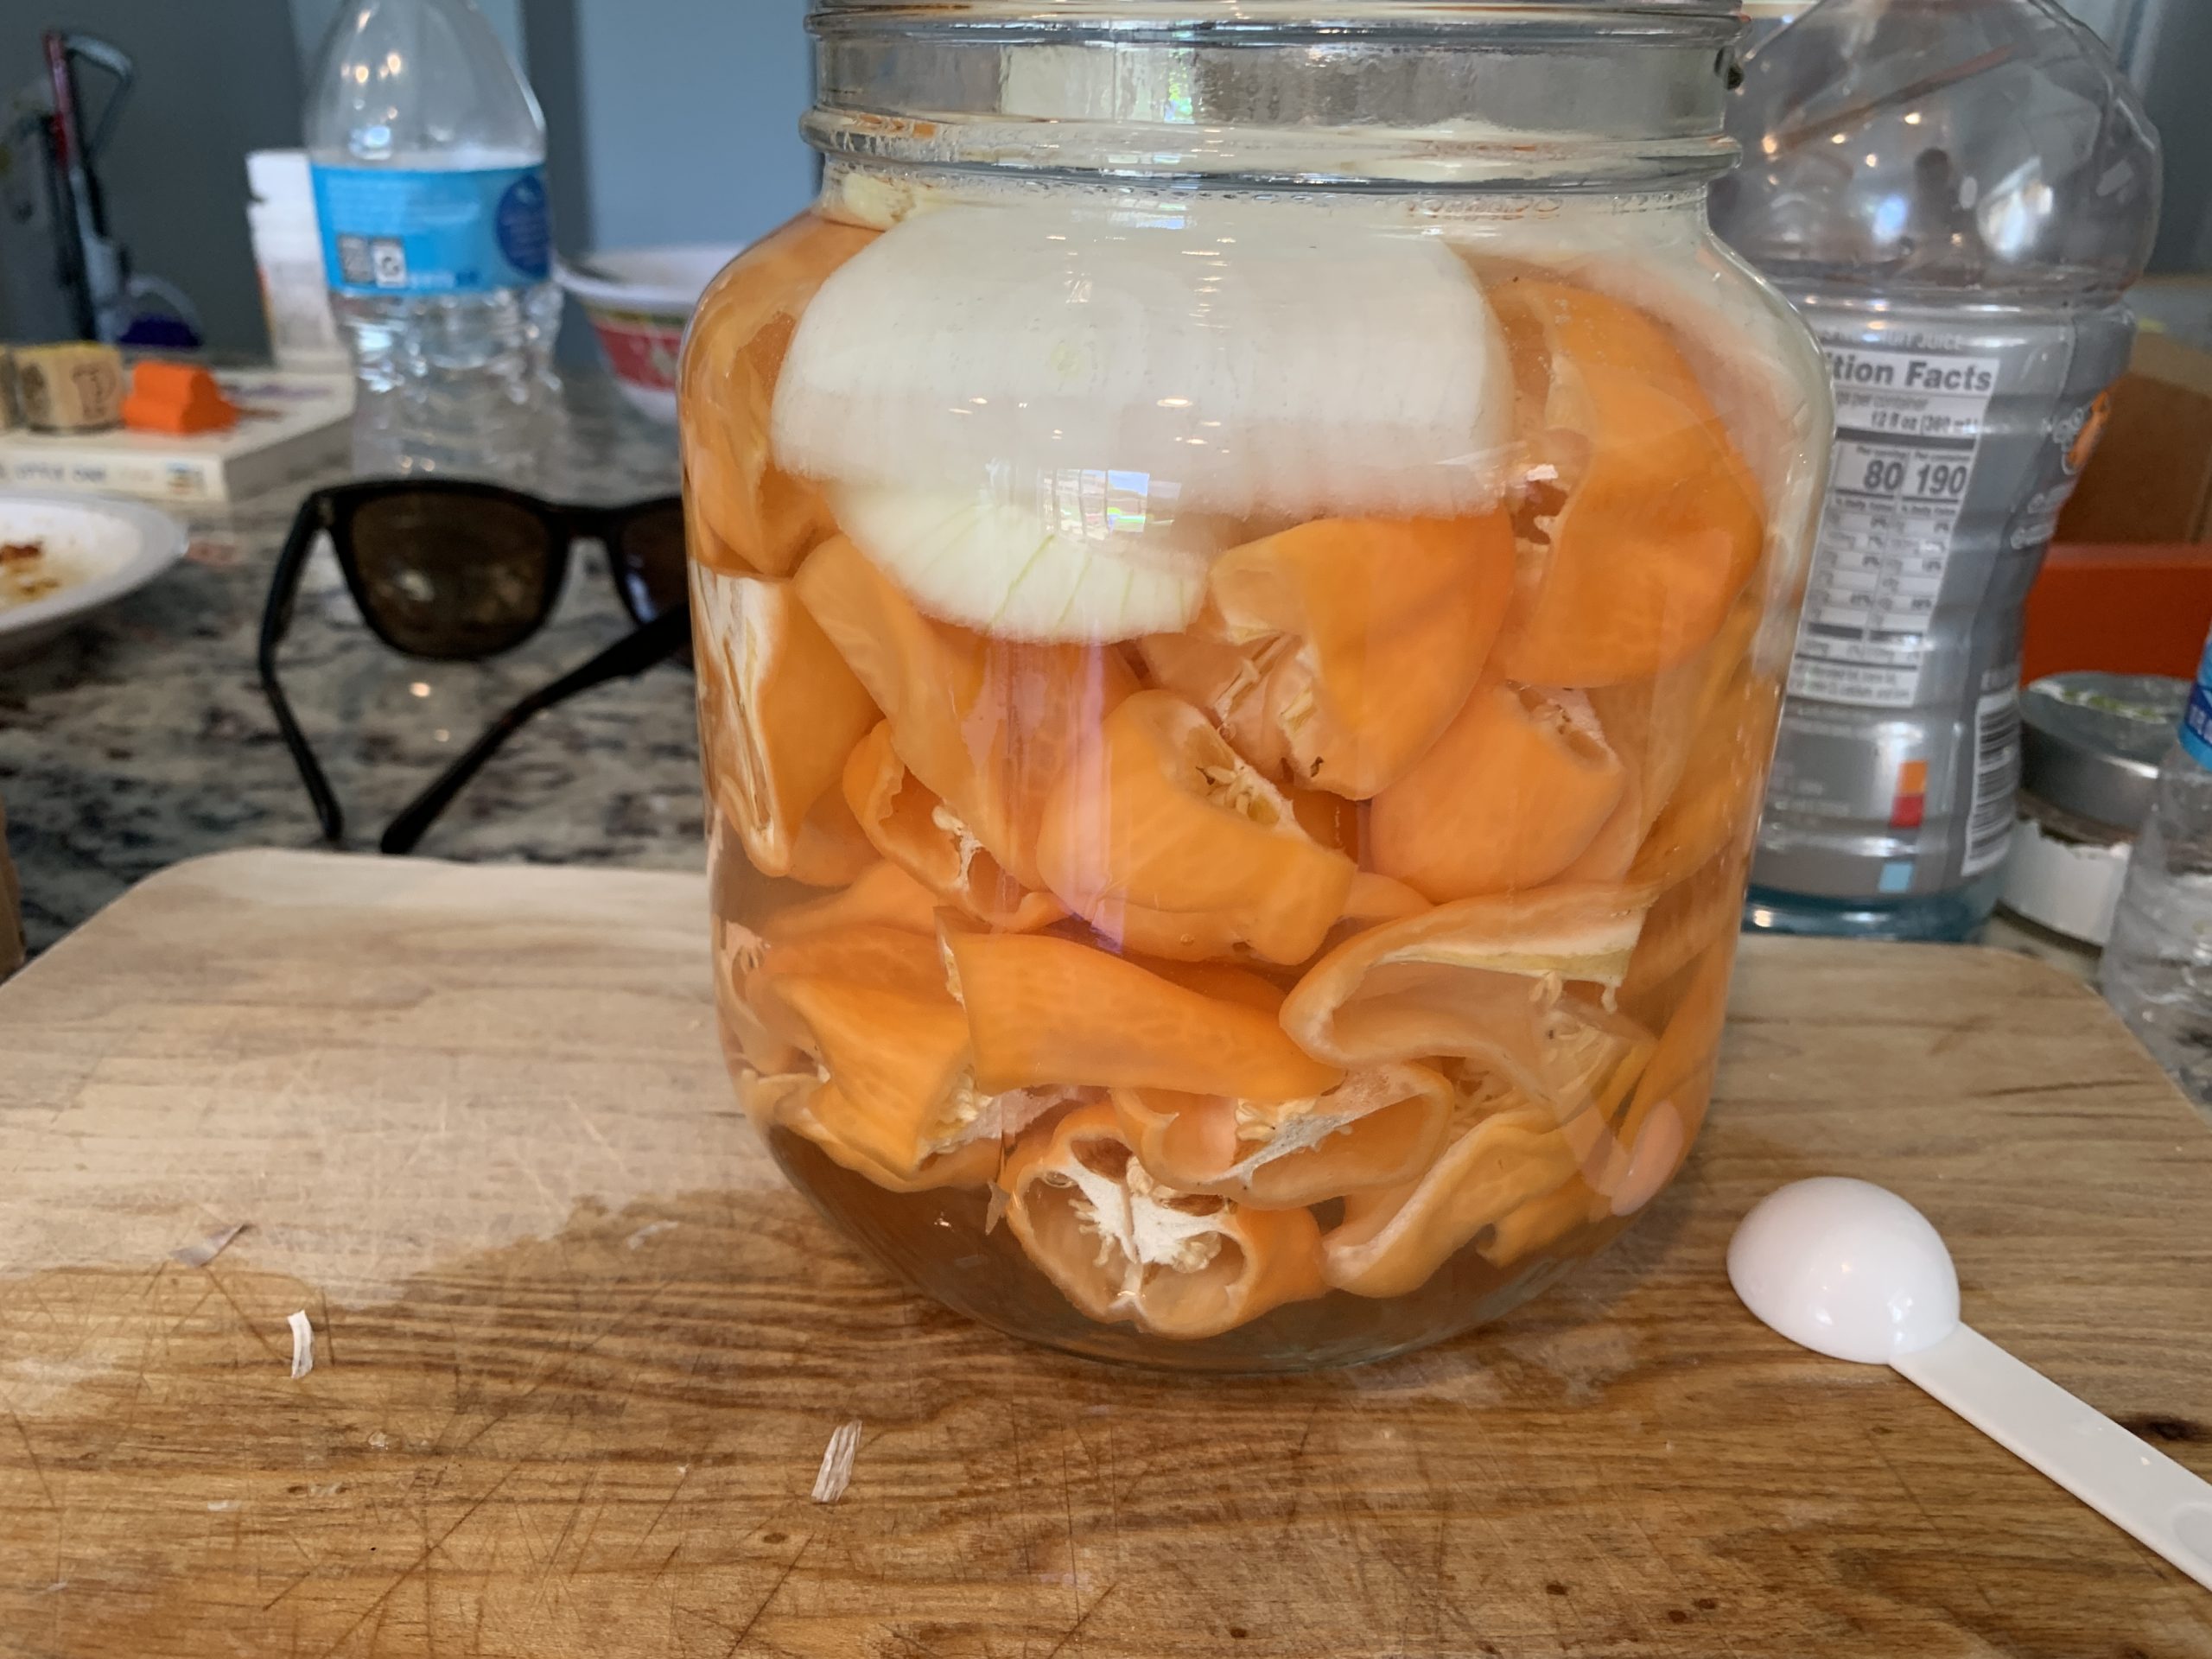
- WARNING: Habaneros are hot and can be dangerous if you get its oil on your skin or eyes. Vapors can sometimes be overwhelming too. Carefully slice the habaneros by first removing the stem and cutting the habaneros in half. If I notice any signs of imperfection from the peppers like mold or black flesh, I will cut that part out, or entirely discard the pepper. Place your sliced habaneros in the fermenting jar.
- Peel and crush the garlic cloves and place in jar. Peel and slice the onions into quarters and add to jar.
- In a large mixing bowl you can begin to make your brine. I estimate a bit under 6 cups of water to fill a ½ gallon jug. All you need to do is make sure you combine the right amount of warm water and dissolve the correct amount of salt. Keep in mind the ratio: 1.25 tsp salt to 1 cup warm water. So to prepare six cups of brine add six cups of warm water (not boiling but enough to dissolve salt) and add in 7.5 tsp salt (1.25 tsp x 6). Mix well and allow the salt to dissolve in the water. Then you can pour the brine into your jar, fully submerging the vegetables.
Weigh Down the Goods
In order for all the good anaerobic bacteria to do it’s thing, you need to make sure that all of your vegetables are submerged in the brine by weighing it down with a fermentation weight. The other reason is that vegetables are naturally buoyant and will gloat to the top exposing areas of it to the remaining air in the jar. These parts can be breeding grounds for mold to grow on your vegetables and cause you problems down the line. You can buy fancy weights for your jars, or you can simply use a plastic sandwich bag filled with water and placed on top of the ferment, weighing it down into the brine.
Waiting & Burping
Now that your brine is set, you can seal the jar, keep it under a towel or out of the sun, and place it in a corner to do its thing for about 1-2 weeks. However, before you can enjoy your tangy garlic habanero hot sauce, you’ll have to do a few things while you wait. Your ferment will start to bubble and create gas over time. That’s how you know the bacteria is doing its work. Depending on how air tight your jar is, you will want to frequently check and “burp” your jars by opening them and releasing the pressure in the jar. If you have a jar specifically made for fermenting or can modify one by drilling a small hole at the top, you may be able to use a bubble airlock device that releases pressure automatically and simply wait until your batch is ready.
Kahm Yeast or Mold
If you go the route of a bubble airlock, it’s important to not fully set your ferment and forget it. You will want to check once in a while for signs of mold, which is typically fuzzy and colored. I once had a small patch of mold growing solely on a piece of onion that emerged out of the brine. If it’s isolated like that you can probably just discard that one vegetable and be ok. However, any more may be dangerous and worth scrapping the batch to be safe.
Sometimes fermenters will find a white, silky film appearing on their ferment. This is likely not mold but Kahm Yeast. This is a harmless fungus that may have grown as a result of some air exposure and can be carefully skimmed off the top and discarded. Too much might have an impact on the final taste, but if you cannot get rid of it completely, that’s ok. You will just need to make sure it doesn’t come back.
Blending & Bottling
The moment of truth has come! Trust me, waiting really is the hardest part, but you do want to be meticulous with cleanliness in this stage as you want to set up your hot sauce to last as long as possible.
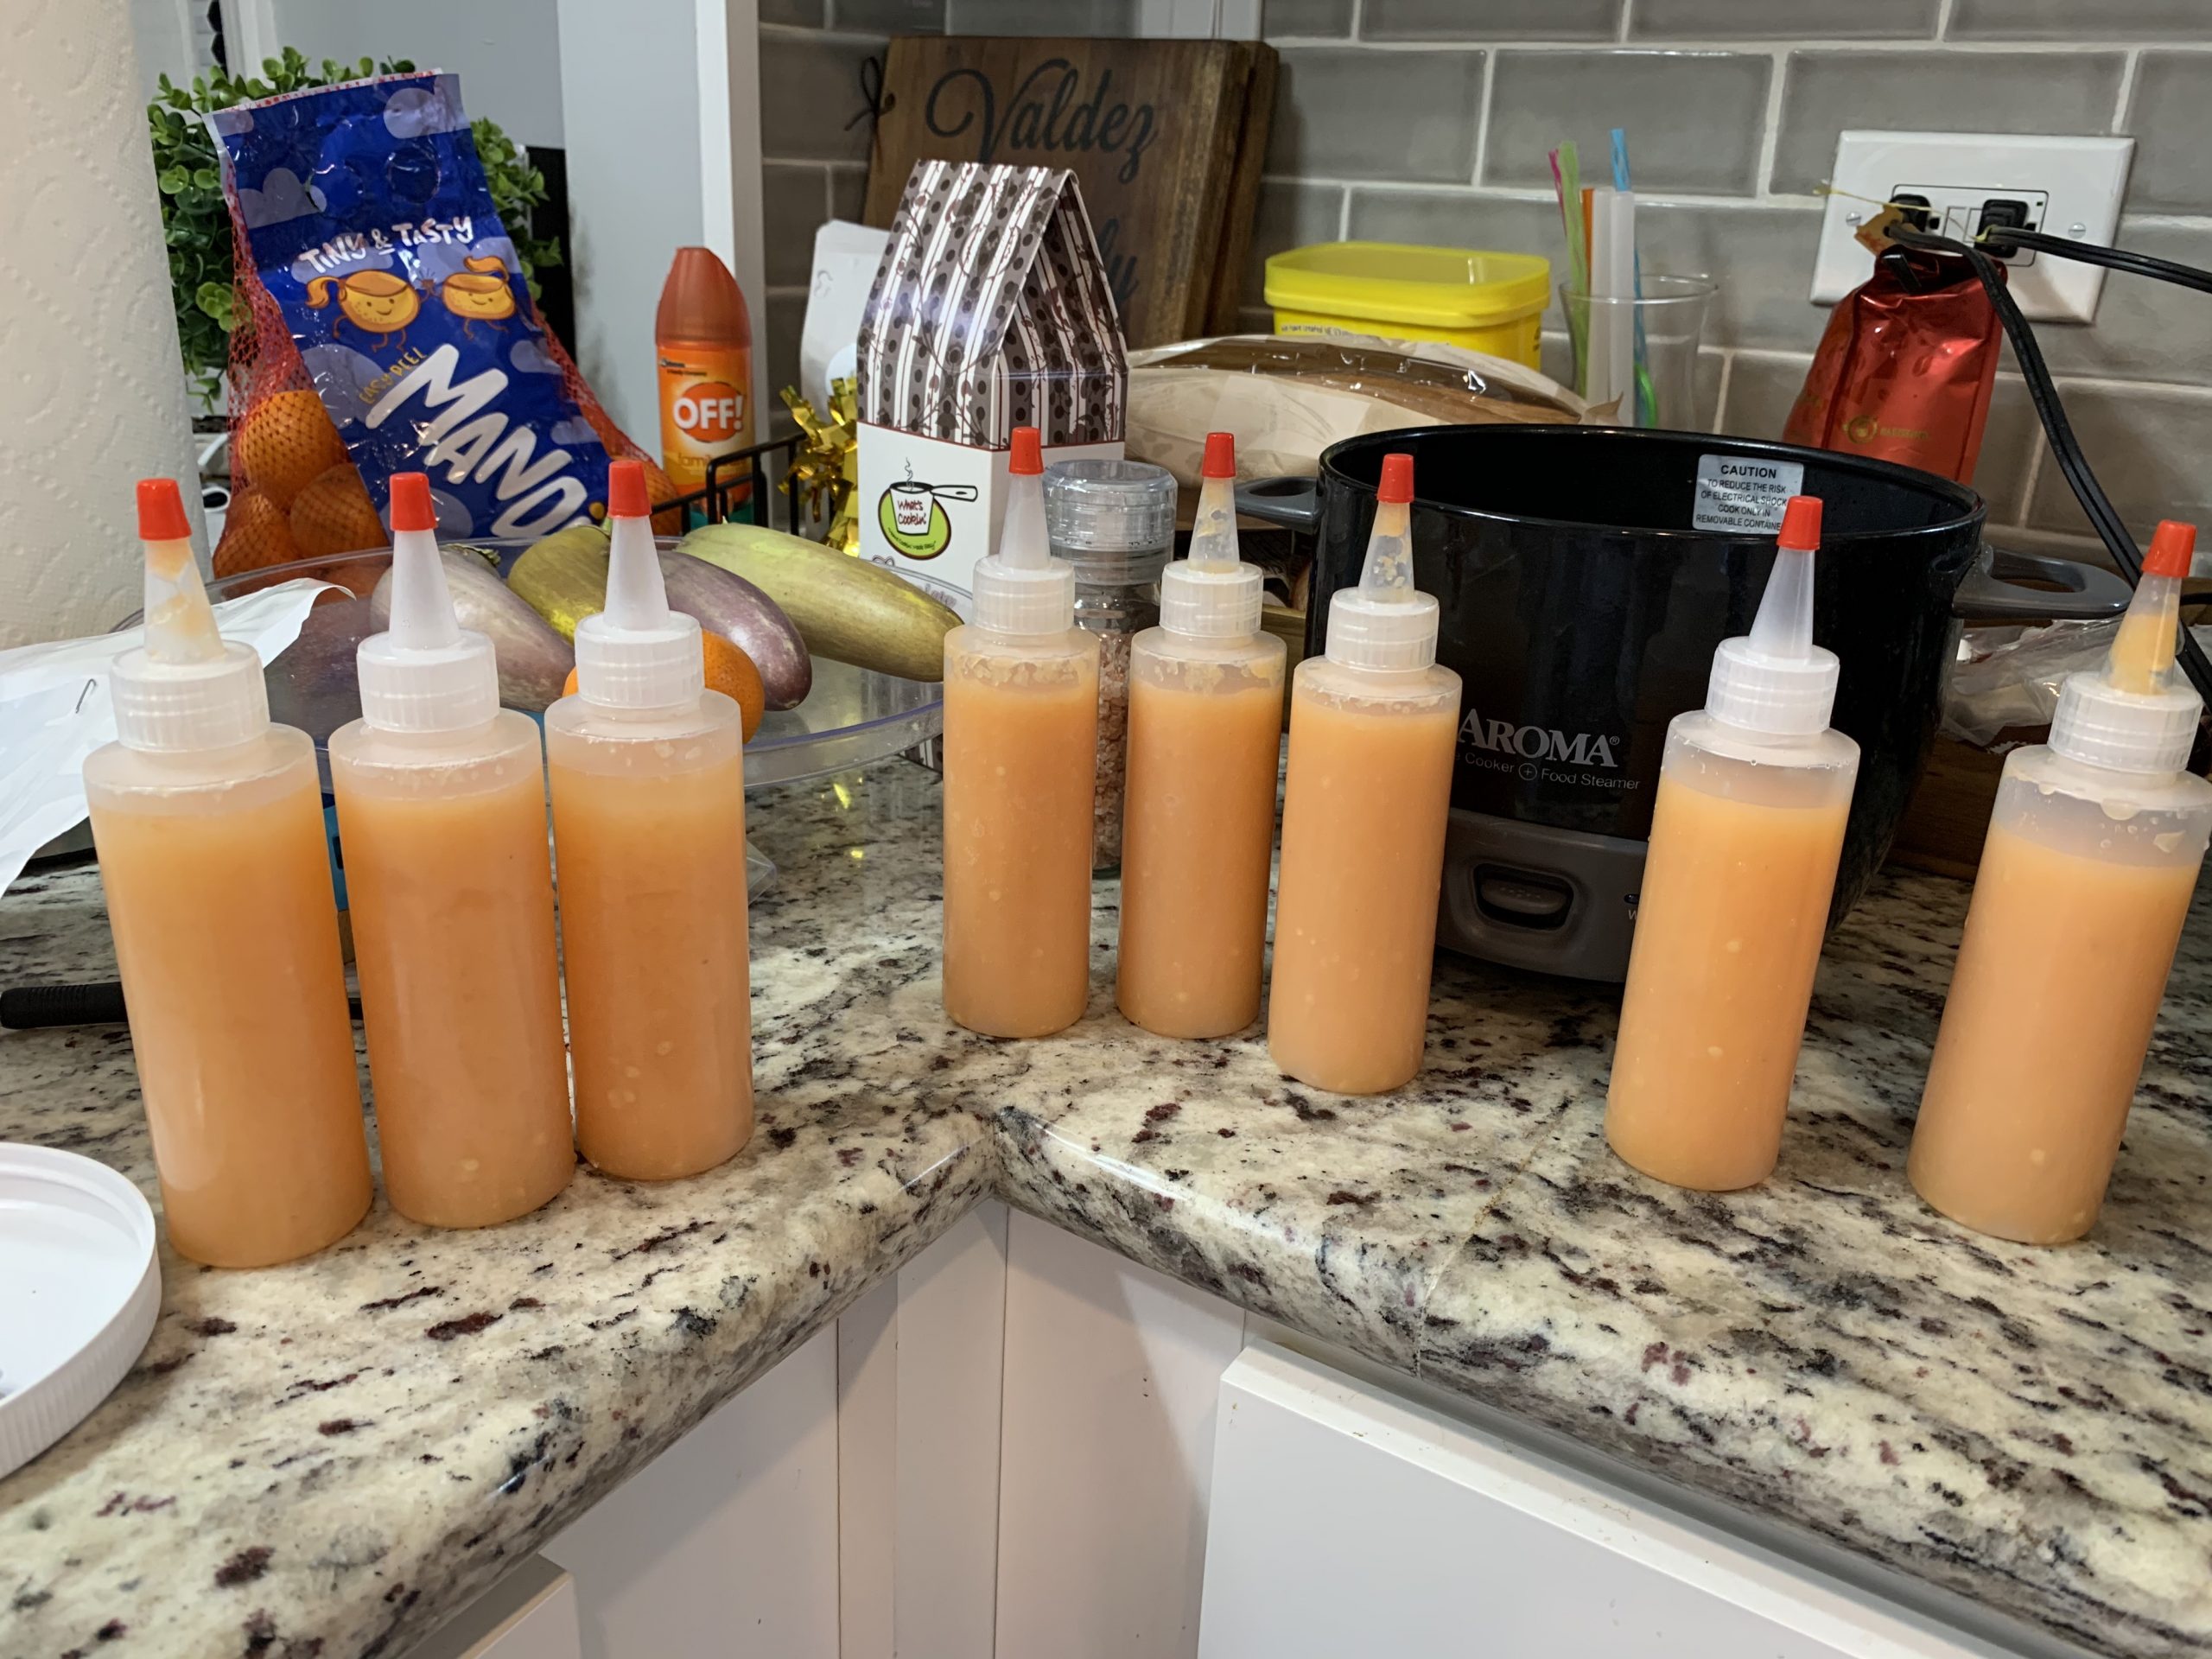
Depending on the type of bottles you are using, you will want to make sure you clean them and sanitize them either by boiling (carefully check with plastic bottles) or using a sanitizer spray specific to bottling and canning. I took my children’s old microwavable baby bottle sanitizer, tested one of my plastic squeeze bottles, and found I could use that.
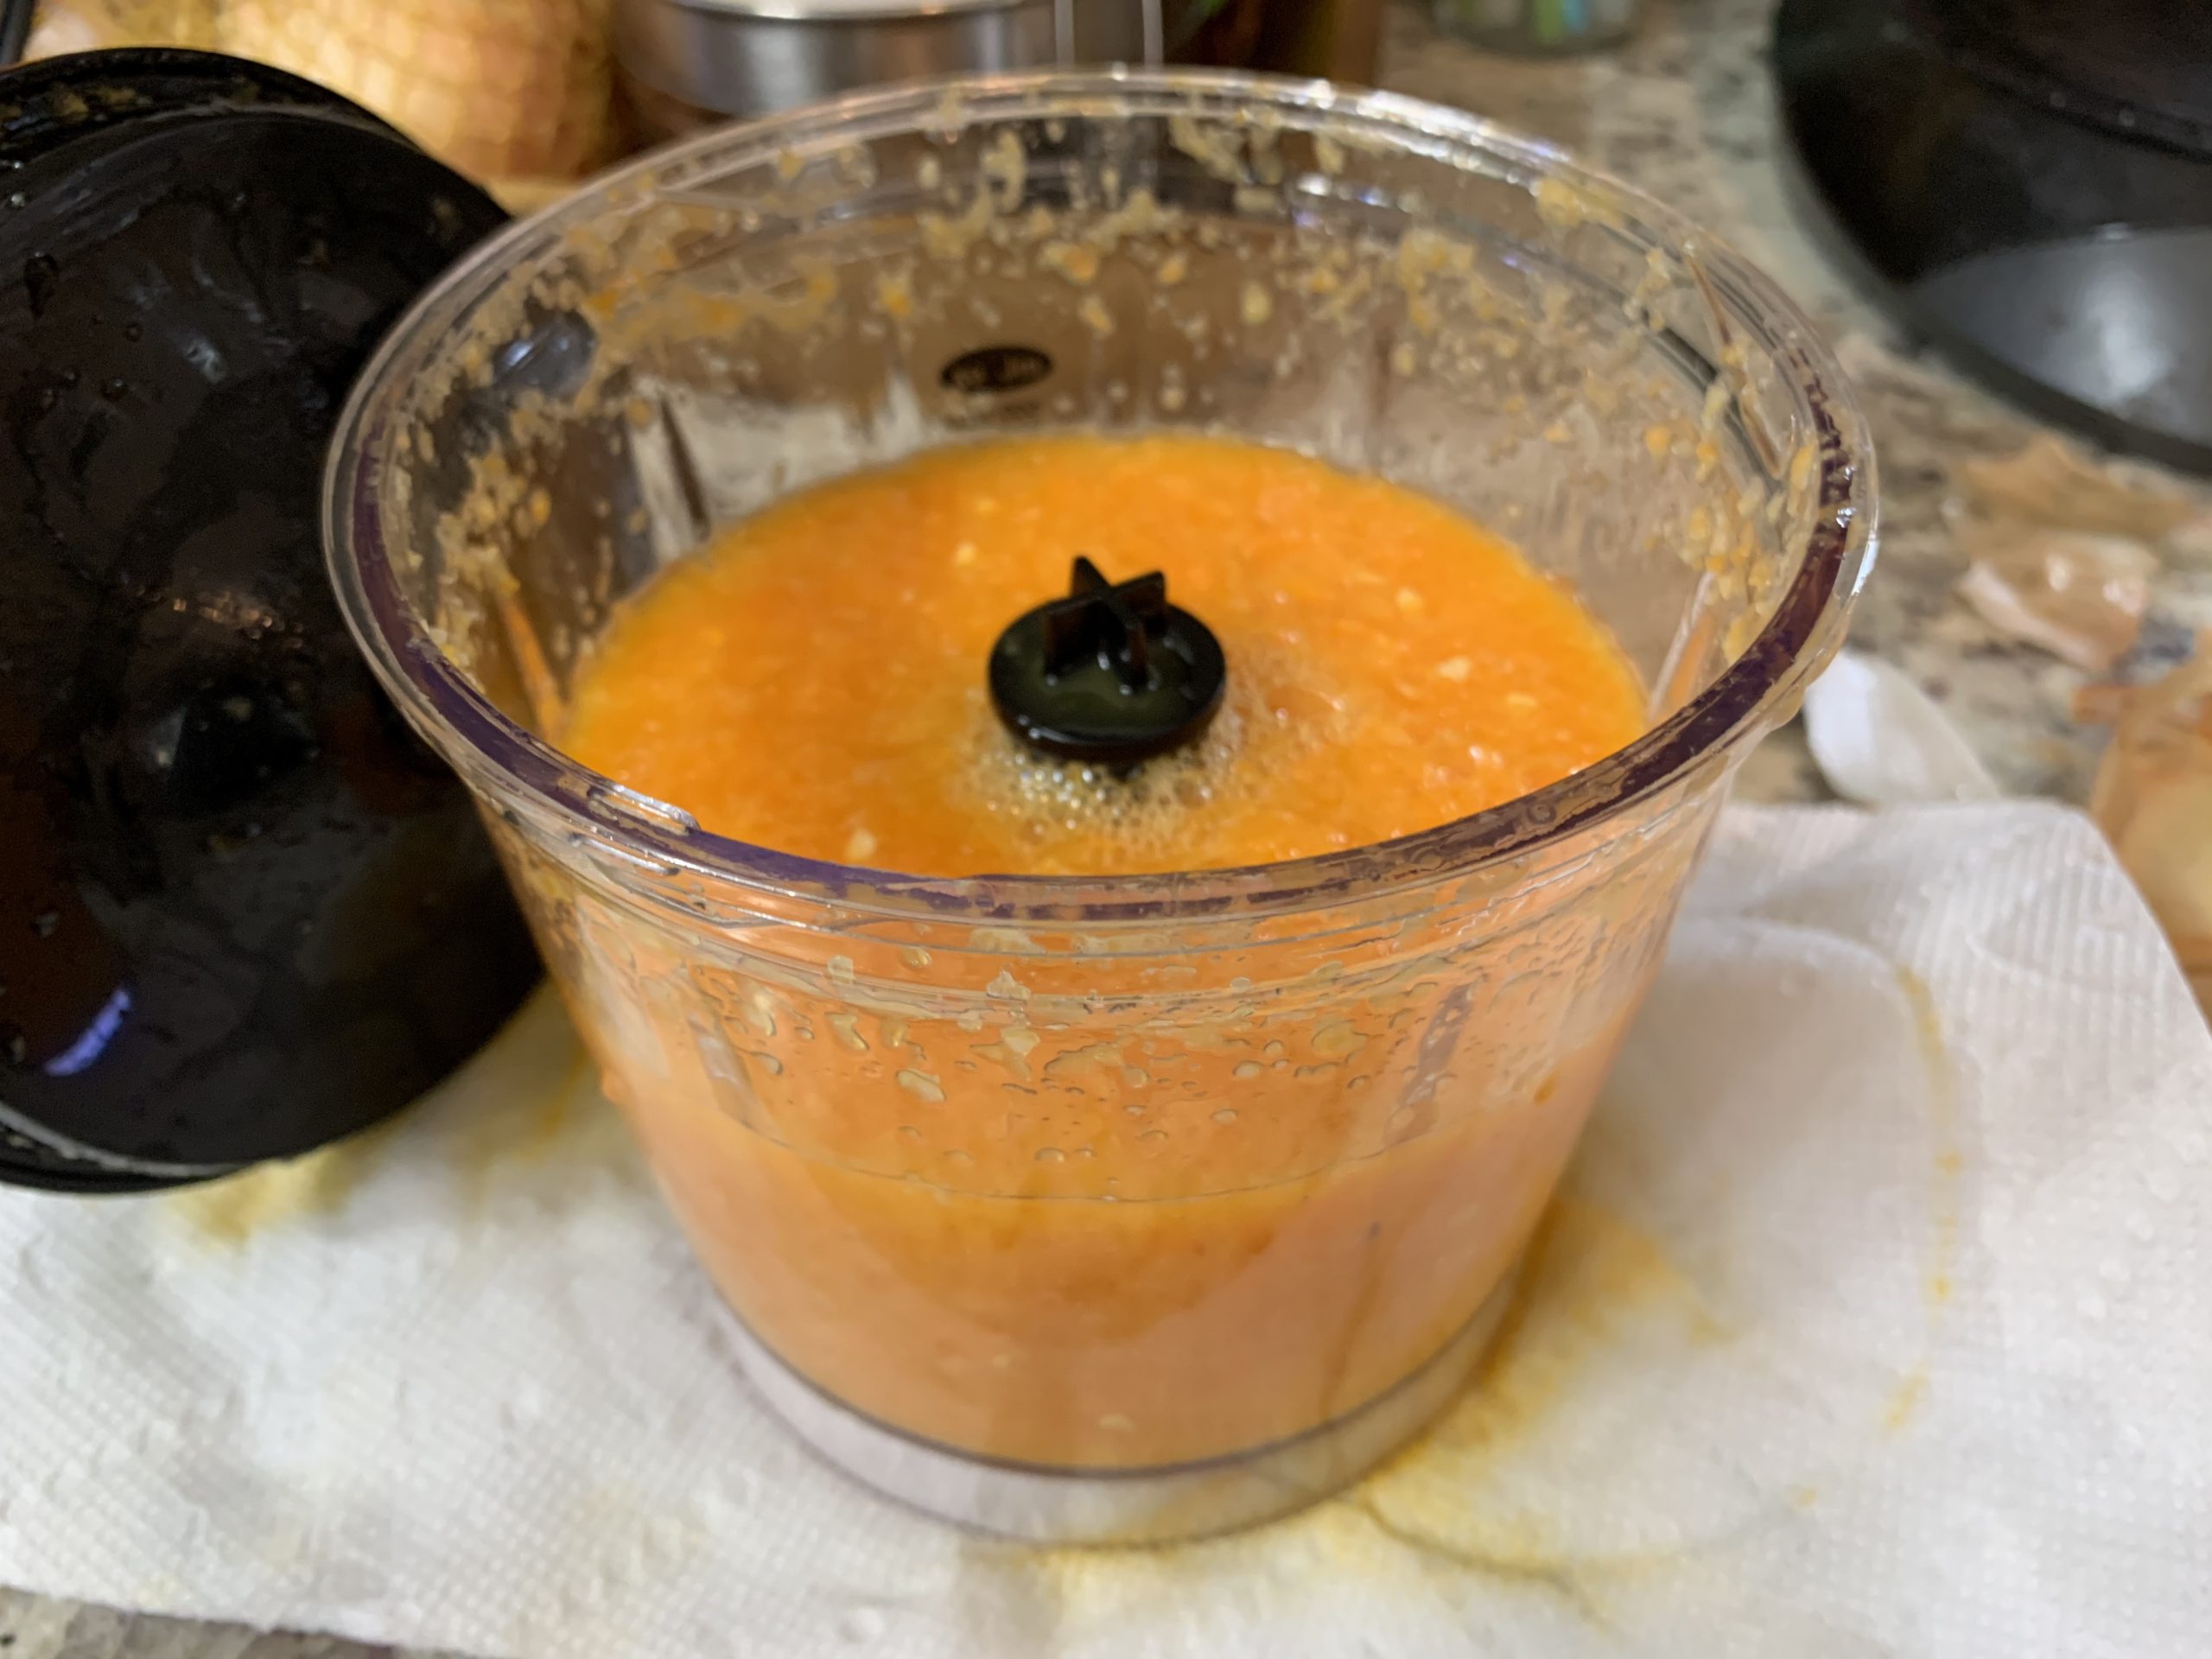
It’s also good to try and sanitize your blender and any bowls, strainers, or funnels you are using. If nothing else, a quick run in the dish washer with the sanitizing function on could work.
- Open the jar of ferment and check for any yeast or mold. If you are good to go, simply pour the contents onto a strainer or colander over a mixing bowl so you can save the brine.
- Pour the fermented vegetables into the blender and pulse. You’ll need to add some brine to get the blender going into a vortex so you can puree the peppers. I’d start with a half cup and add in maybe ⅛ cups or even tablespoons at a time. It’s harder to take out excess liquid, so just keep adjusting and blending until you reach the consistency you like. At this stage, some people like to run their blended sauce through a mesh strainer, but I like keeping some chunks in the sauce, almost like a fine salsa.
- Once you reach the right consistency you’re ready to bottle! Simply open the sanitized bottles and use your funnel to fill in each of the jars or squeeze bottles. Keep in mind that your mixture is still going to continue to ferment. If you choose to bottle in glass bottles with a firmly tight lid, and keep them for a long time on the shelf or even in the fridge, there is a risk of them bursting. For these sauces I like to bottle them in plastic squeeze bottles with plastic caps loose enough to let air out the top but secure enough to keep normal air out. You can still use fancy glass flip tops or screw on bottles as long as they’ll get some frequent use (or you remember to check and burp them).
Name your sauce & enjoy!
Once you get into the swing of your first few batches of hot sauce – if you’re like me – you’ll want to delve into different combinations of peppers and flavors like adding mango or pineapple to your hot sauce. You can also switch up the peppers, add sweeteners like honey or sugar, and play with the flavor profiles. However, no matter where you land in your creation one of the most fun things you can do is give your new sauce a name. I once made a banana pepper hot sauce mixed with a carrot base and called it my “Monkey Bunny” hot sauce. Naming your sauce is just another way you can get creative and have fun with the whole experience. Happy fermenting!