If you are like me you normally walk past the butcher section of your grocery and go straight to the packaged meat section whenever you buy meat. I call this the “safe meat”; pre-cut, smaller portions, typically less expensive and a solitary, non-judgmental selection experience. Though, at times it is nice to gaze at all the different cuts of beef, pork and fish gloriously displayed behind shiny glass.
While I am typically intimidated by both the price and selection of the butcher section, over the holiday I mustered up the courage to buy something a bit special for our Christmas dinner. This was also a COVID-19 Christmas, meaning we weren’t having the joy of family over like we normally do. So because of that, I wanted to try to make this dinner extra special.
The meat that caught my eye was the classic standing rib roast. It was a bit serendipitous because I wasn’t even thinking of a rib roast until 1) I walked past the butcher section and realized they were on sale for the holidays, then 2) I remembered that my favorite cut of beef is a ribeye steak.
Save Wilbur, make a rib roast!
Many first-time rib-roasters like me will be happy to know that the most basic, no frills rib roast is actually quite simple to prepare. It does require one or two days of prep to season and dry your ribs in the fridge (more if frozen). Then once that’s done, a couple of sessions in the oven is all it takes to finish. I didn’t even mention that the rib bones act as a built-in roasting rack that your meat stands on.
I know some families go with the traditional Thanksgiving Turkey and Christmas Ham, holiday prime-protein combo. My extended family may be surprised to know this, but I really dislike ham. The good parts are glazed on the outside and it just gets worse closer to the bone. Little did I know Christmas rib roasts were a thing (why did no one tell me?!). Thus, I think I’m going to start my own tradition of doing a standing rib-roast with my family. Then I’ll slowly incorporate the beef back into extended family Christmas once the quarantine lifts.
I mean, what’s not to like about juicy, rich, flavorful beef? I’ll take it over dry chewy ham any day. Save Wilbur, make a rib roast!
Make sure you have these before roasting your ribs
- Large roasting pan (rack optional)
- Digital meat thermometer, preferably a probe one you can leave in the meat and monitor outside your oven
- 4-5lb rib roast (3-4 ribs)
- 1.5-2 Tbs Kosher Salt
- 2 Tbs Ground Pepper
Roast your ribs in just 3 easy steps
It’s important to note that the first step takes some time (at least 24-48 hours). I recommend planning this step at least 2 days prior so you have ample time to dry, rest it back to room temp and still make it in time for you to do your full roast.
For example, if you are serving dinner 6pm on a Saturday night, start this process Thursday morning and on Saturday morning you will take it out to rest at room temp before you roast into the evening.
If you are using a frozen roast, start defrosting in the fridge on Tuesday morning. You can count on about 4-5 hours per lb to defrost in a refrigerator. Even though that’s technically 25 hours for a 5lb roast, I would play it safe though and put it in a full 48 hours prior to when I need it.
1. Prep, season and dry your meat
First, remove your defrosted rib roast from it’s packaging and place onto a large cutting board or sheet pan. Pour out your sea salt and cracked pepper into a small bowl. Using your hands scoop out some of your spice mixture and rub it into the meat and bones. Continue rubbing until you have completely covered the entire roast, down to the individual bones. Don’t worry about “over-salting” as about 30-40% of the salt is usually lost during cooking. Although, you do not want to be caking the salt on the meat like you’re preserving or brining it; just rub enough in to season it.
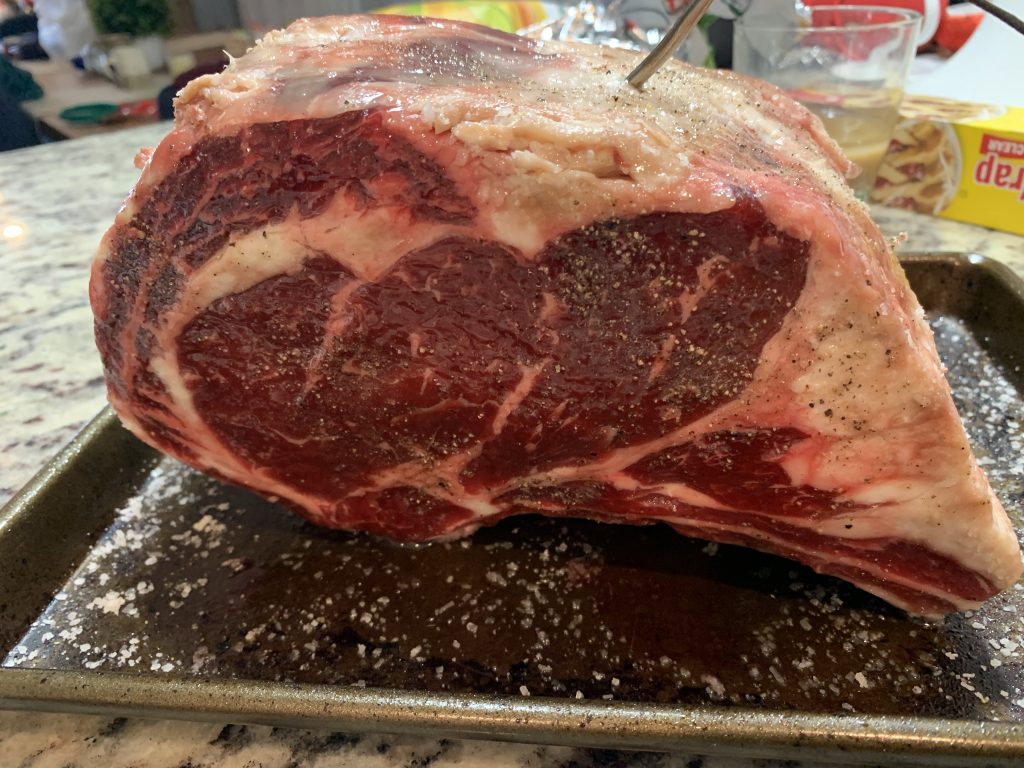
Make some space in your refrigerator and place the entire roast inside, uncovered. You can move it to a smaller pan if needed. Then let the roast sit overnight and for at least 24 hours undisturbed in the fridge. It is going to absorb the salt and also dry the meat.
This drying period will help enhance the taste of your meat and also give you dry surface for better char when you roast. If you want, you can even prep your roast several days early and let it dry for more than a day if you like. Your call.
On roasting day, take the entire roast out of the fridge and let it sit for two to three hours until it reaches room temperature.
2. Roast Low and Slow
When you are ready to cook, rest your roast in the roasting pan with the rib end side down. You are going to rest one end of the roast on the ribs so they appear to be “standing”. To illustrate what I mean, just make sure there is an arc of bone between the pan and your roast.
Stick the meat thermometer into the top of the meat and into the center of the roast. If your thermometer has one, set your alarm to go off at 118F degrees.
Put the roast onto the bottom rack of your cold oven. There’s no need to preheat here. We want to allow the heat to permeate the ribs slowly and evenly. Once in your oven, turn on the heat to 250F degrees and wait until the internal temp hits that 118F mark. This could take 3-4 hours depending on the size of your roast.
When your roast hits the target temperature, remove it from the oven and set aside. It will continue to keep cooking for another 15-20 minutes and make its way to that medium rare doneness as you let it rest.
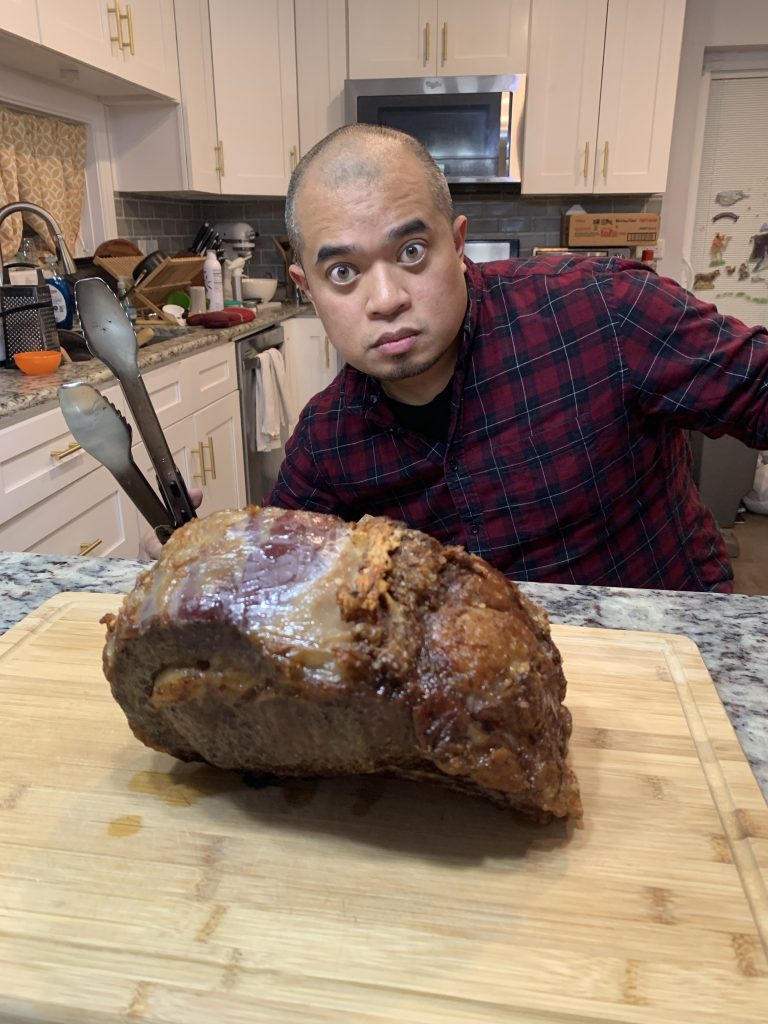
3. Sear the outside in high heat
Instead of searing the entire roast up front like you would a steak, we are doing a ‘reverse sear’ where we sear the outside after we’ve fully cooked the meat. This allows you to cook the middle to just the right temperature, something very important for rib roasts.
Turn up your oven as close to 500F or 550F as you can. Most conventional ovens max out around the 450-500 mark, so do what you can. Once the oven hits temperature, put the roast back inside the oven. At this high of heat you might get smoke, so turn on the oven exhaust fan or open a window.
Set a timer for about 10 minutes and then check to see how it looks. You may want to aim for a dark, charred surface with some noticeable texture, but feel free to adjust to your liking. If it’s not there yet, go for another 5 minutes at a time and check until its where you want it to be.
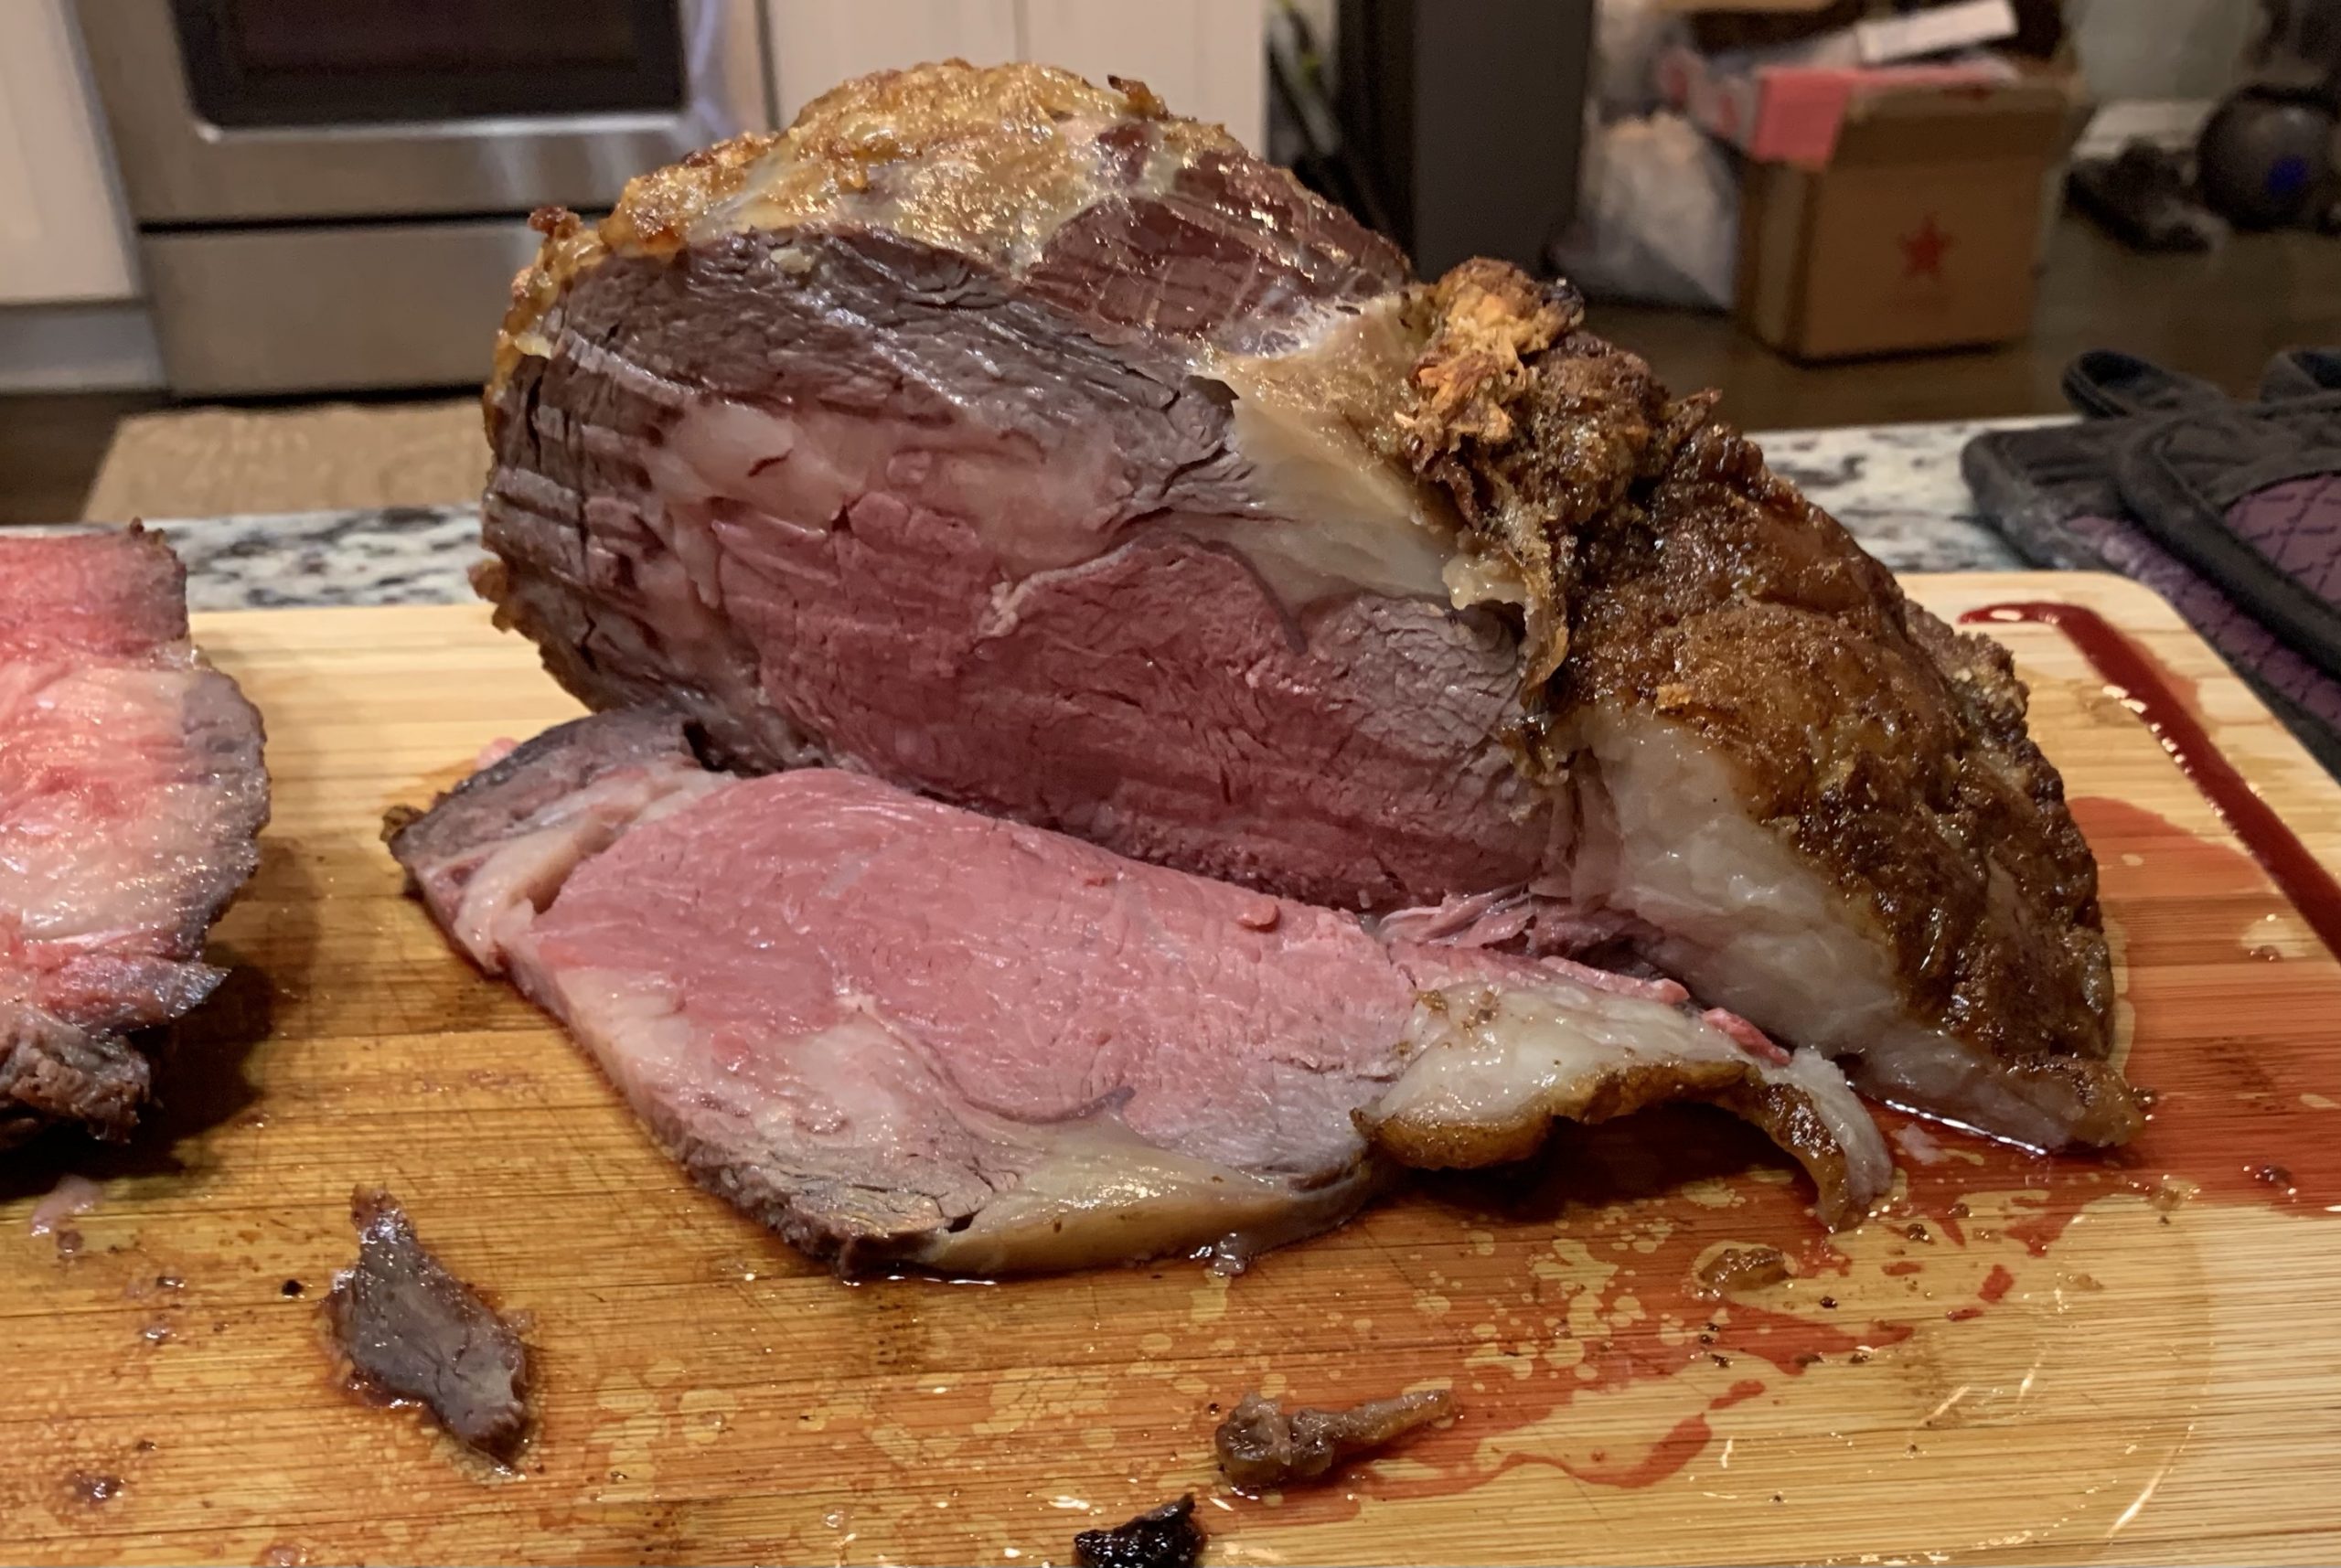
When you are through searing your rib roast you can remove it from the oven and transfer directly onto a cutting board for cutting.
Two ways to cut the rib roast
1. Between the Bones
There are a couple options to cutting a rib roast and they center around portions. If you have a small party and your intent is to serve each diner a meaty slab of beef, you can simply cut the rib roast down between each bone and serve them bone-in, like a mini tomahawk. You and your diners can then navigate eating the beef off the bone as you wish.
Another great reason to cut it down the bone is for when you are casually making a roast (as in not a big family gathering) and want to save portions of it for future meals. To be honest, there’s enough meat attached to one rib to feed my small family of 4 when we consider 2 of them being young children. I would then have the option to vacuum seal or freeze them to eat another day.
2. Bone-off & Sliced
When you want to share a standing rib roast with larger groups you may have the need to better manage portions. The second way to cut a roast involves first separating the ribs from the large meaty chunk of the roast.
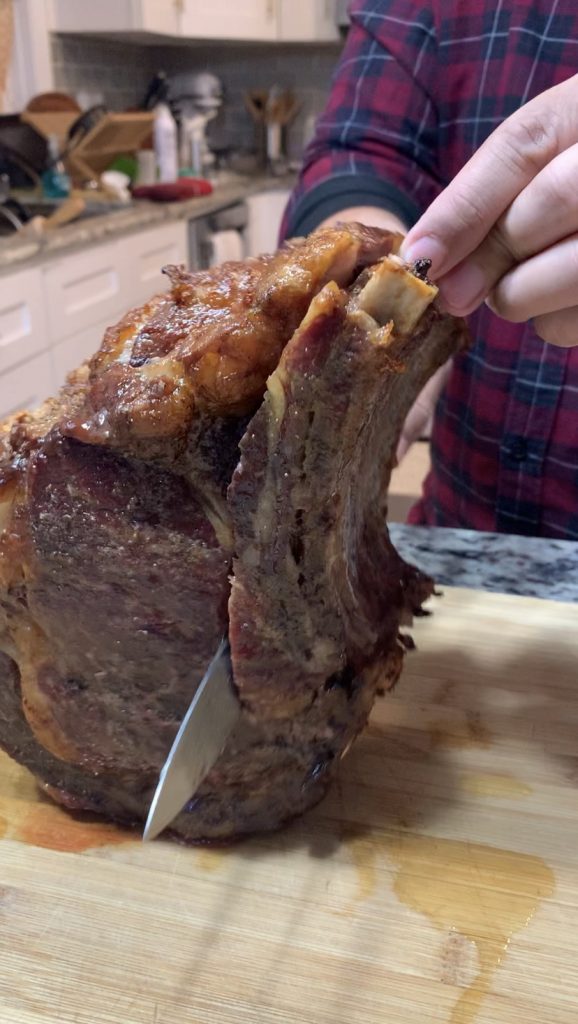
When your roast is cool enough to handle with your hands (or with kitchen gloves) simply hold the standing roast up so the bones are pointing towards the ceiling. With a sharp slicing knife (or large chef knife) lay the blade behind the bone where it meets the top of the meat. Your knife will be crossing all 3-4 bones at once, not in-between two bones. You want to move your knife in a slow, smooth back and forth motion as you slowly slice and separate the bones from the larger piece of meat.
At this point the bones will be connected and will come off as one big piece of rib. You can now slice between the ribs and serve as separate portions on your platter.
The main rib roast can be sliced across the arc of the meat into portions. I like to do about 0.5-1” inche but you can decide how thick or thin you want to make portions depending on who you are serving.
The outer portions near the ends will naturally be more done while the middle will cooked to the rare-medium rare doneness. Also there can be a large portion of fat at the tail end of the roast which some people choose to cut. I do cut a portion of that off but save a good bit of it on the meat for each diner to decide / enjoy.

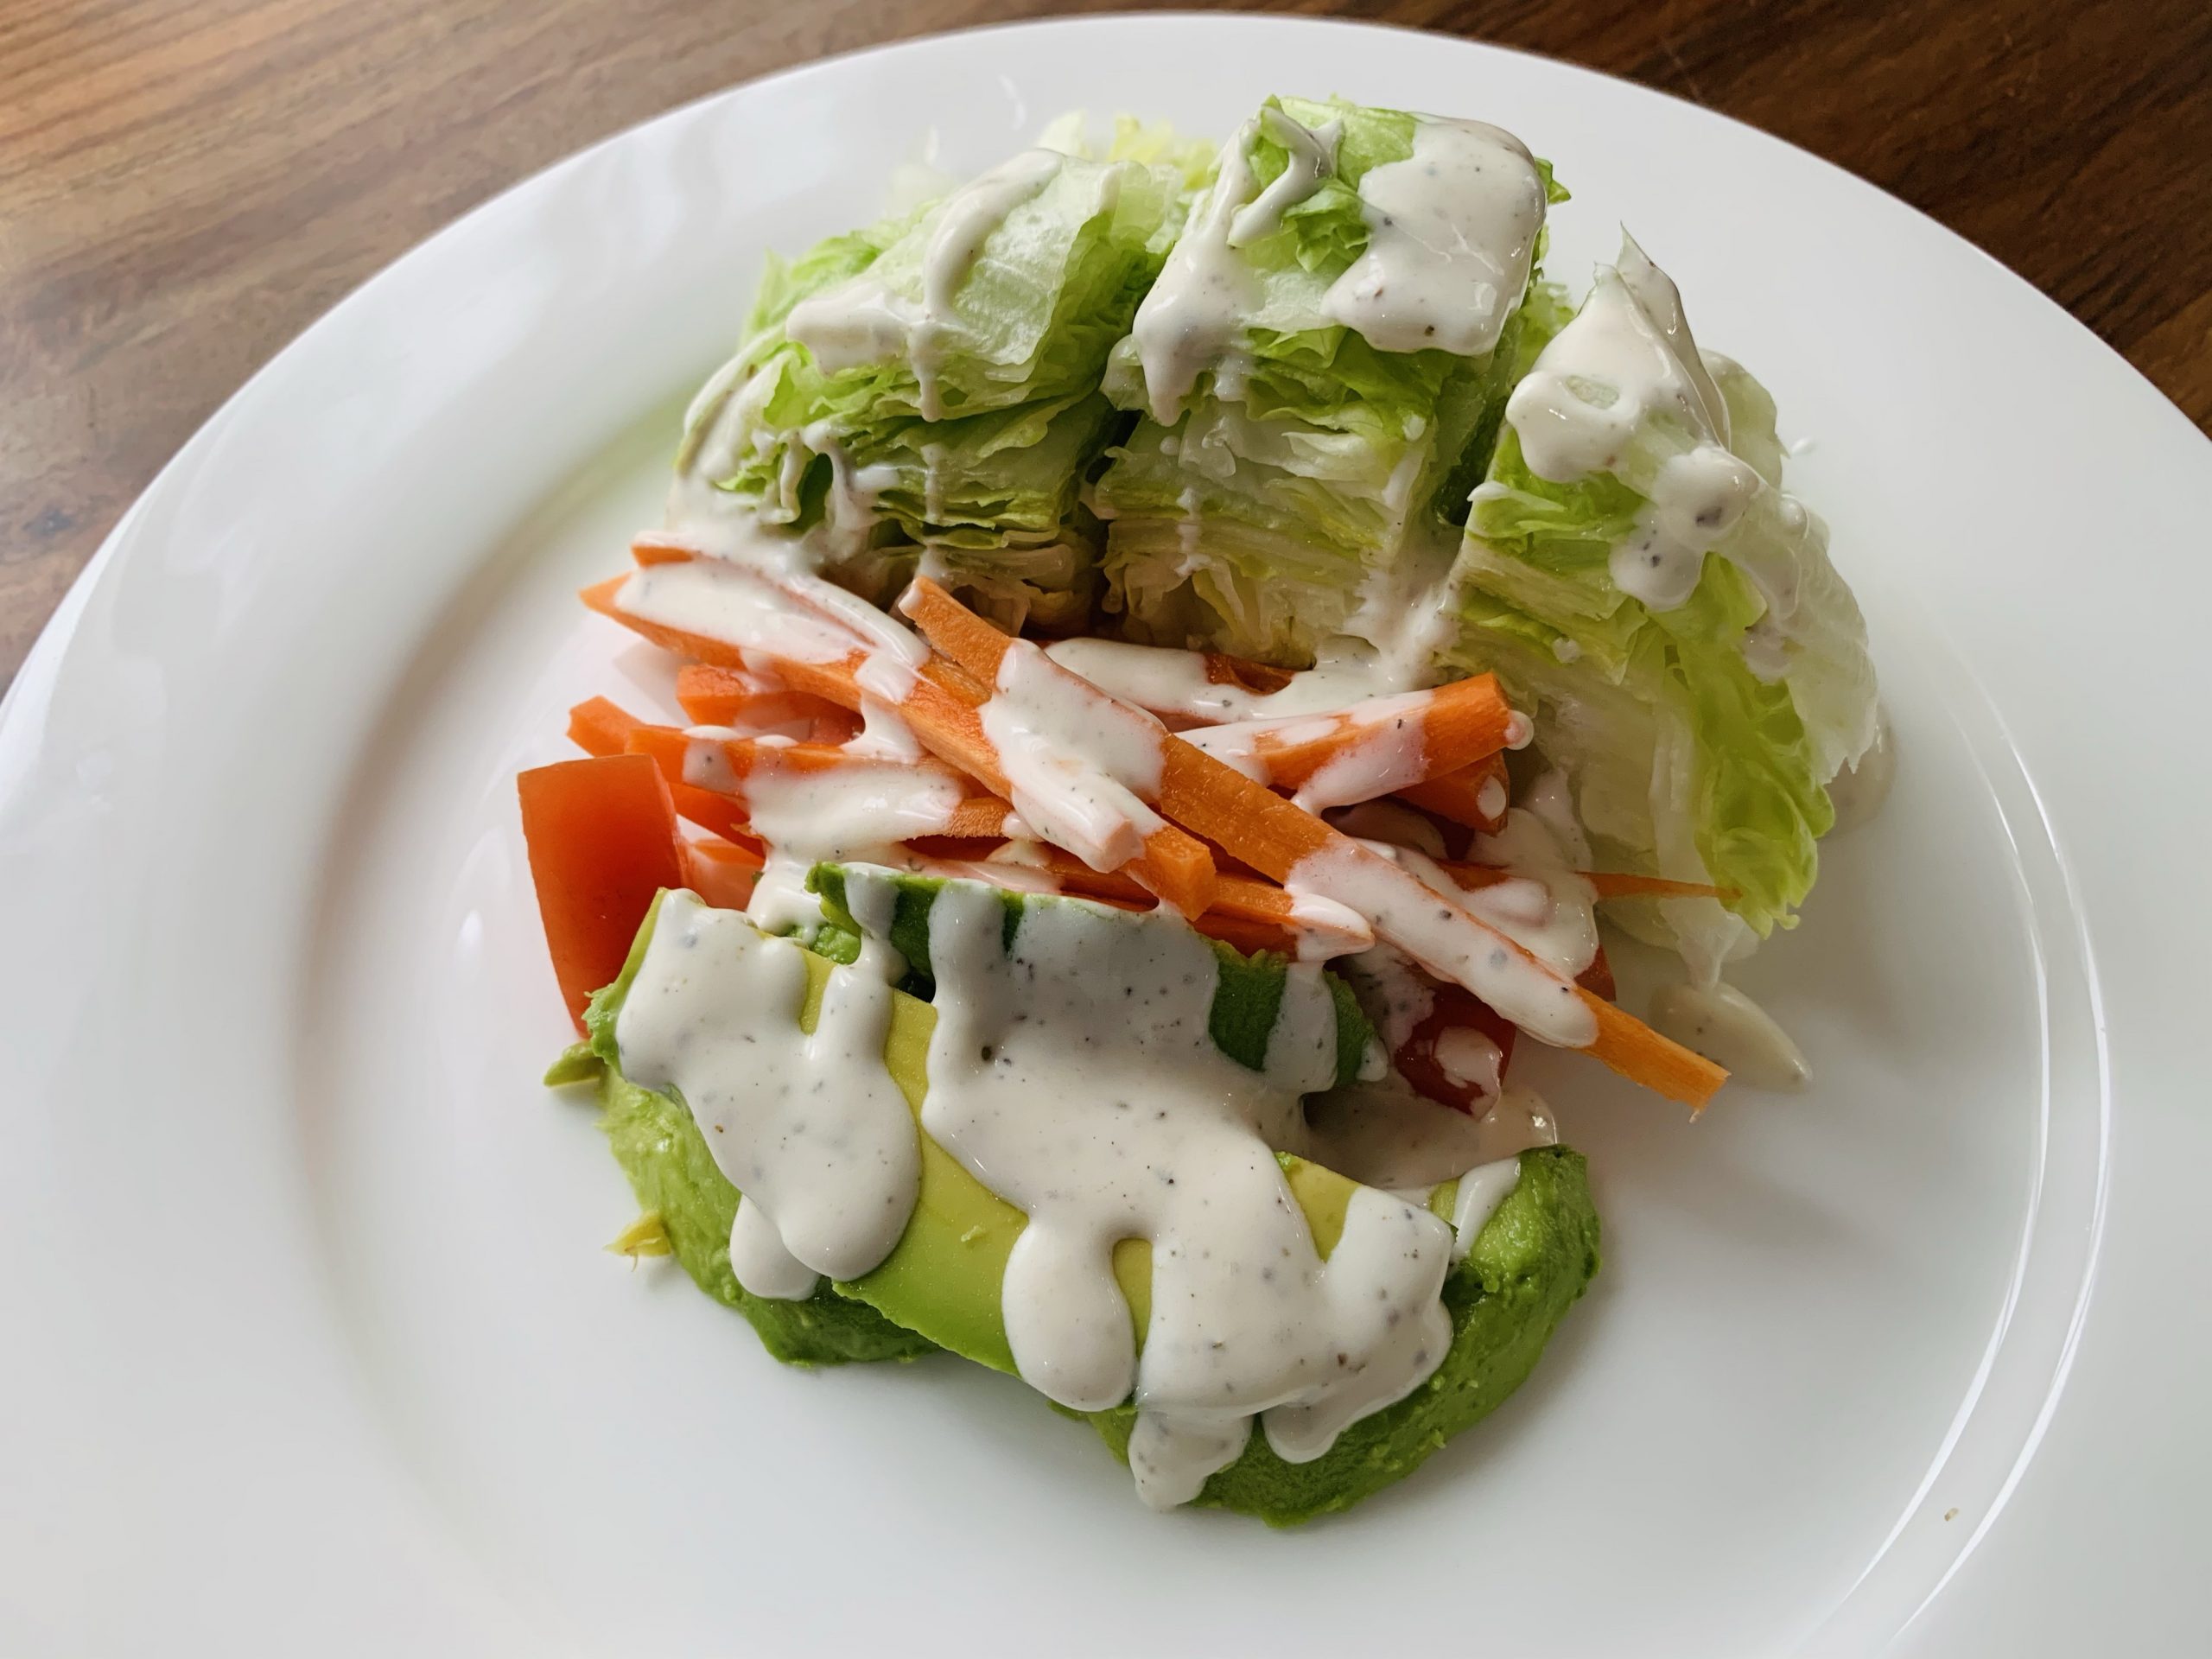
No matter how you choose to cut your rib roast, serve immediately when it’s hot and juicy! I eat mine topped with grated horseradish and sour cream and usually served with a side of baked potato and vegetables. Occasionally, I’ll take more time with sides and make a creamed spinach or au gratin potatoes to get that “steakhouse” feel.
Build on the basics for the next one!
Hopefully this provides you with a good starting point for making your own standing rib roast and one you can build on for future roasts. In the future you can change up techniques like doing a longer dry session, searing before your roast, or even changing up the herbs and spices you choose to flavor the meat. Either way you choose to go in the future, I hope this dispels any initial fears of how to handle this large and expensive cut of meat. I hope this also gives you confidence that even the most basic preparation of a standing rib roast can yield deliciously amazing results.
Enjoy!