
Where It All Began
Six years ago I started on this journey to learn how to make homemade ramen. It was 2014 and the ramen restaurant trend was starting to hit the midwest. Ramen-ya were popping up everywhere around Chicago (Slurping Turtle, Ramen San, Furious Spoon, Strings, etc…). At the time I just finished watching the PBS series The Mind of a Chef with David Chang, whose first episode was all about ramen noodles, and my wife and I were just married so we had all the time in the world to do what we wanted (read: no kids). It was then when I decided to take on the challenge of making my own ramen broth.
It is likely that I am not the first person to go through this nor do I claim to be on the cool side of a “homemade ramen trend”. I just knew I loved to cook, I had the time, and I wanted a new challenge. I also knew I wanted to make Tonkotsu broth because I recently fell in love with it. On a recent trip to L.A. my wife and I had sampled Silverlake Ramen’s heavenly take on Tonkotsu (one of my top 5s). However, my problem back then was I did not have a great starting point.
I did some online research for blogs and videos on how to make Tonkotsu ramen broth. They were very comprehensive in terms of broth making. However, while I knew what I needed in terms of ingredients and steps to make a broth, what was really lacking for me at the time was a guide on putting it all together.
How Young and Naive I Was!
Ramen is not just broth and noodles. It is broth, noodles plus a complex layer of flavors that stem from things like seasonings, tare, aromatic oils, and toppings. I did not know that nor did I have a definitive guide that established that kind of starting point or put all those concepts together in one place. I was hyper-fixated on making broth and thought having that and some pre-made noodles I bought from Mitsuwa was all I needed to recreate the experience.
My first batch wasn’t bad, it was actually rather decent for a first time. I made a soft-boiled egg (unknowingly unseasoned) and some pork-belly which I actually braised in the broth (not a great technique). Cobbled together it made a good bowl, but it wasn’t the experience I was looking for and it took another six years for me to get it right.
That brings me to today. Certainly there are home chefs just like me who wanted to take on this challenge at one point in their life but had very little idea where to start. This homemade ramen starter guide is for you. No it is not a recipe guide or a comprehensive, end-to-end guide either. However, it is your one stop shop to understand what goes into a proper bowl of ramen.
I am writing this to make sure you have the 30,000 foot view of the components of a ‘traditional’ bowl of ramen so you can know and plan each component before you seriously invest the time, energy, money and emotion into making the perfect bowl. This is the starting point I didn’t have six years ago.
Good luck reader. Let’s begin.
Understanding Your Components
Instant ramen is an amazing invention. The fact that someone engineered a way to cram a delicious experience, that would otherwise have taken a cook hours to achieve, into a simplified 5 minute process is really a feat of human ingenuity. If you think about the more “prepared” equivalent of that experience, you will begin to find that there are several layers that make up the tastes you get when you eat a freshly made bowl of ramen. Often, they are the same kinds of flavors a pack of instant ramen is trying to mimic.
Now that you’ve decided to dive into this rabbit hole (trust me it’s a rabbit hole) you will want to have an understanding of the basic building blocks before you begin.
The 5 Layers of Ramen
The five basic layers or components of a bowl of ramen are below. Jump to any section if you like but we will learn a little bit about each one.
1. Broth Base
When I made my very first batch of broth I was treating it like a soup….thinking I was defining all the flavors in this stage. [I] was wrong…
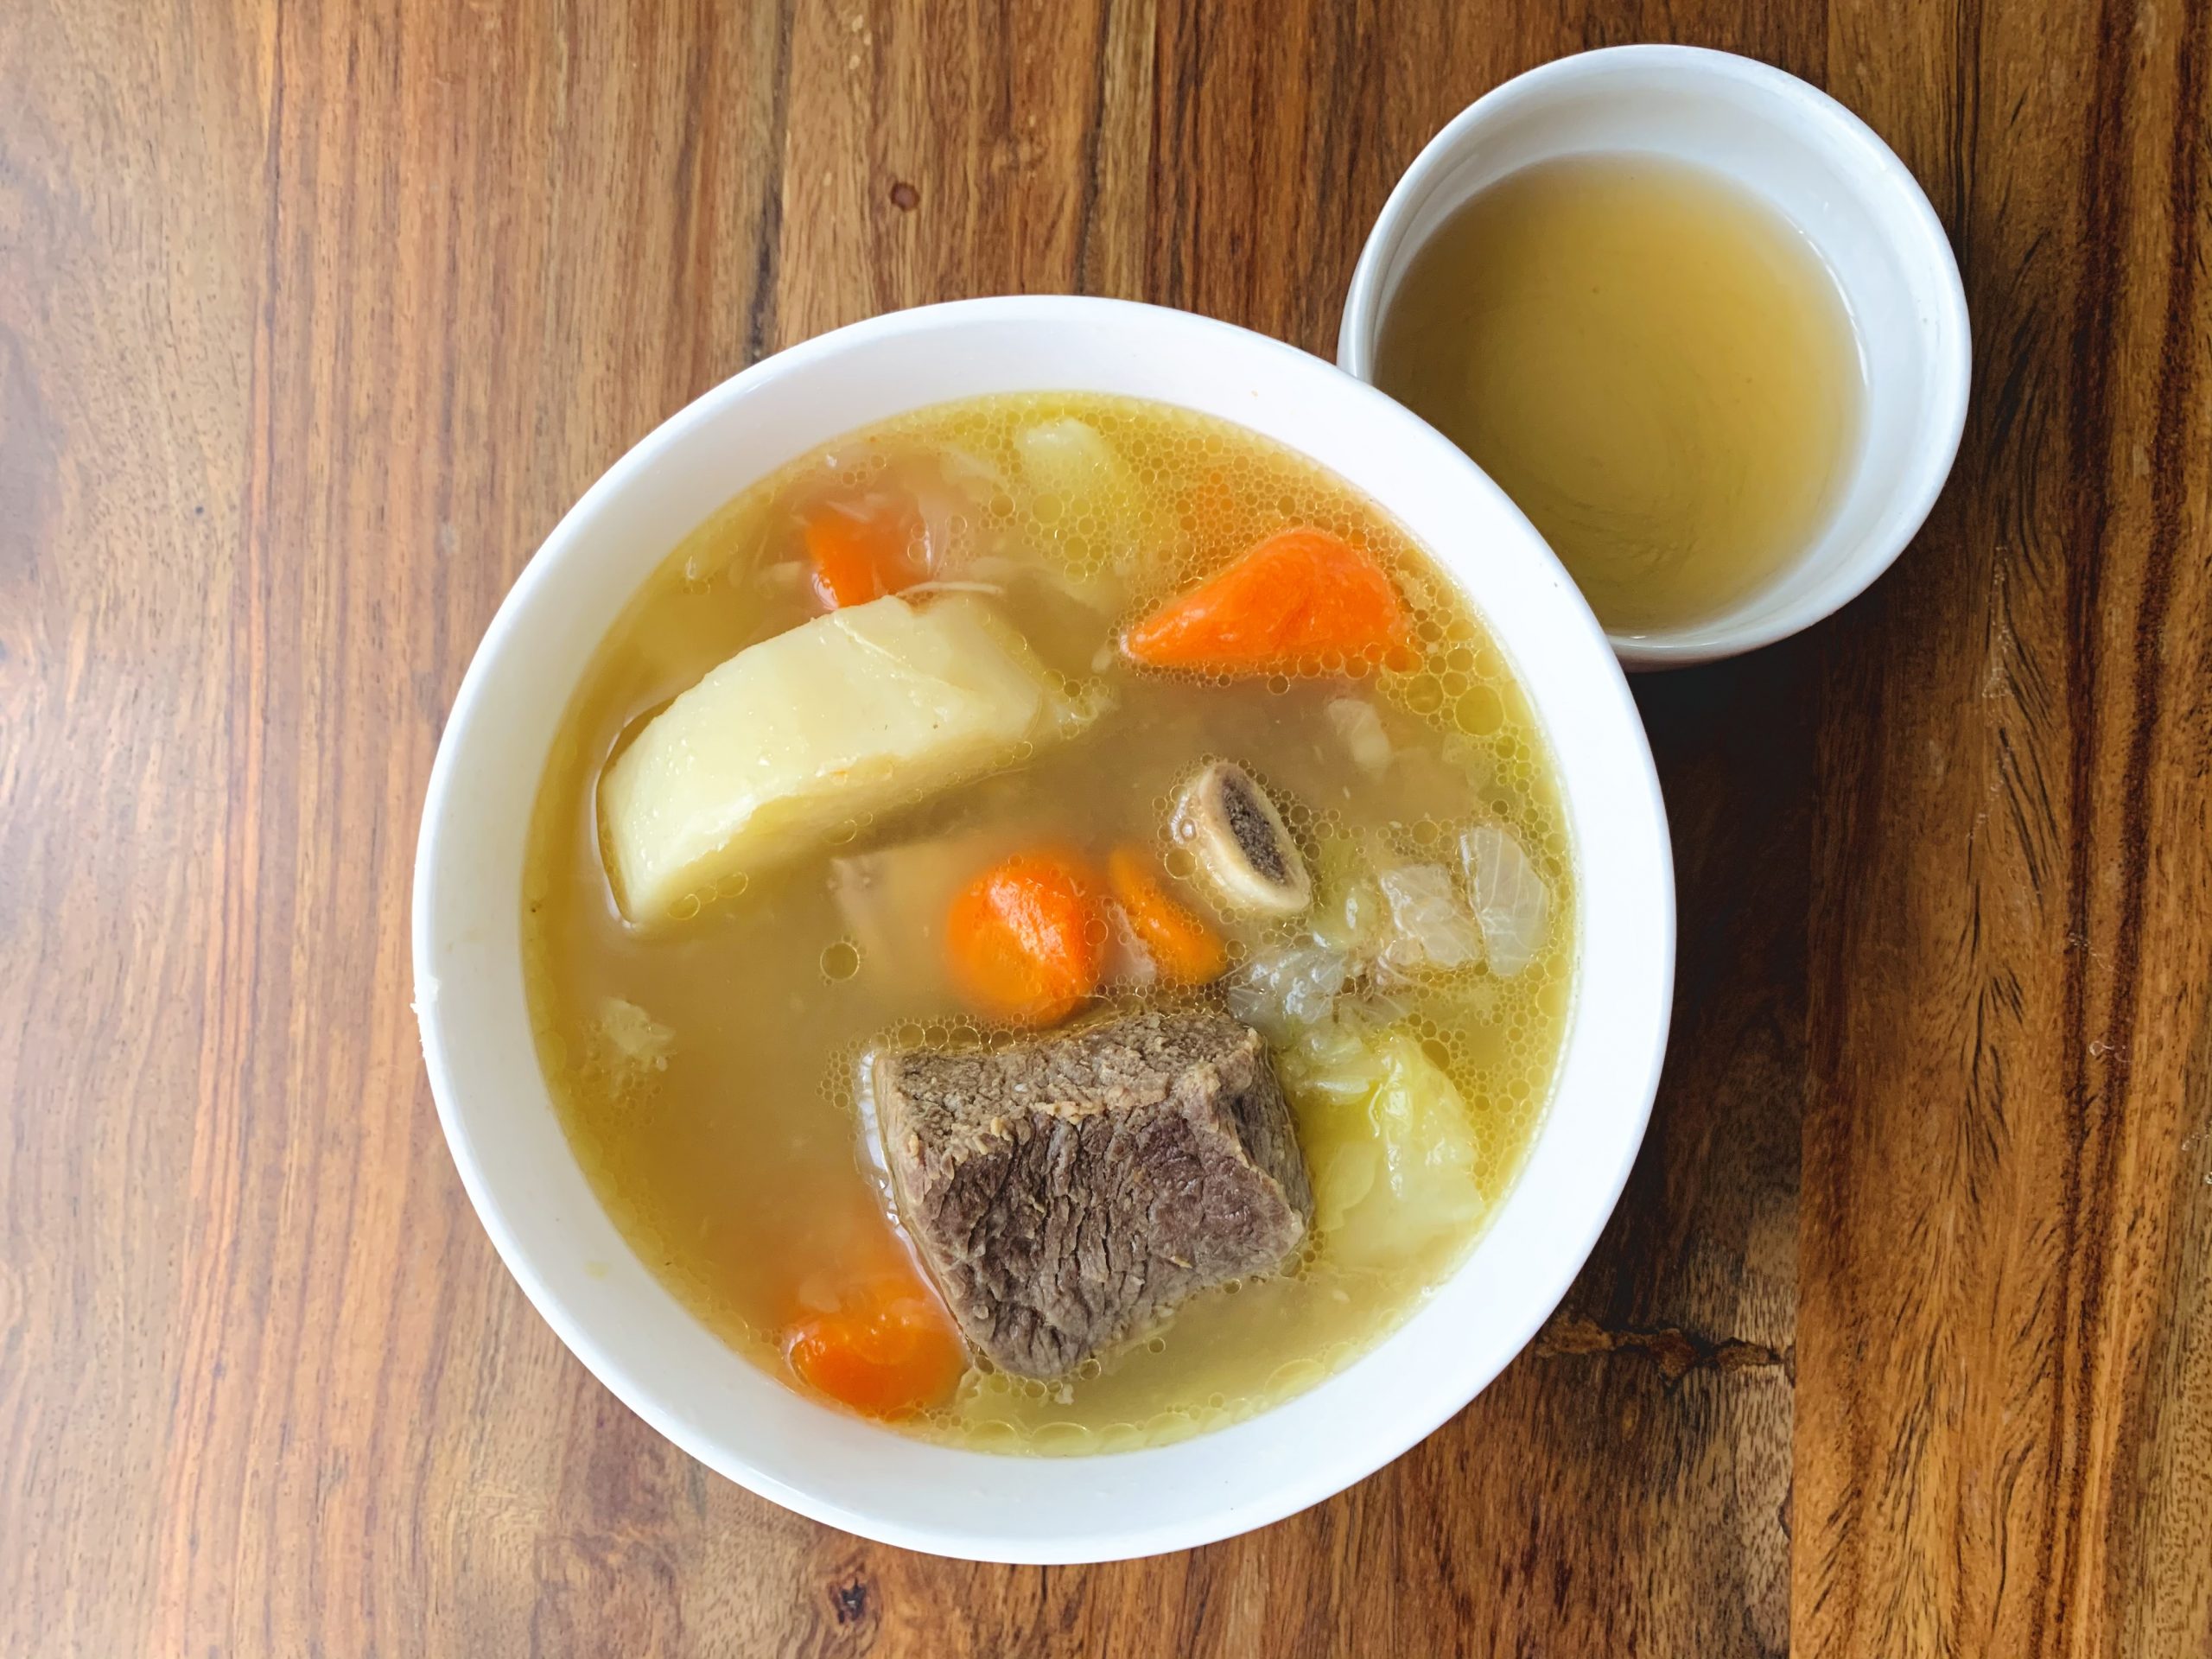
The broth base is the body of your bowl. In other words, to put it more commonly, it is your soup stock. Choosing the right broth base is important as it helps you define your ramen. A pure pork bone stock may give you a thick, creamy, fatty soup base to work off. Perhaps a combination of pork and chicken stock may be a good middle ground for a lighter soup that is packed with fat and flavor. A chicken only stock alone may be an even lighter base to either build on or keep it simple. Lastly, fish based stocks or shellfish stocks (e.g. shrimp heads & shells) can take your ramen flavors directly to the the sea. I haven’t tried yet but I know you can even get a fully vegetable based stock from things like dried kombu sheets and mushrooms.
If you are just starting on your own homemade ramen journey my advice is don’t underestimate or overestimate what the broth really does. It is important to know your broth’s limitations and the exact role it plays in the process.
When I made my very first batch of broth I was treating it like a soup. I even seasoned it with salt at that point because I thought I had to. I so wanted to get all the flavors in there so I packed it with aromatics like onions, ginger, scallions, mushrooms and lots of garlic thinking I was defining all the flavors in this stage. However, I was wrong. The strong burst of flavors I was seeking did not materialize like I thought they would in the final product. That was the job of the other layers to produce like tare or aromatic oils.
My tip is don’t treat your broth as the entire body of your flavor. Don’t nix the onions or ginger but if you want specific highlights (like garlic) save those for the other layers like the tare or oil because they will pack a bigger punch in your end product.
Once you find the right broth base it will help guide the way you choose all the other layers of your ramen bowl like the thickness of your noodles or the flavor notes you want to accent in your other ingredients and toppings.
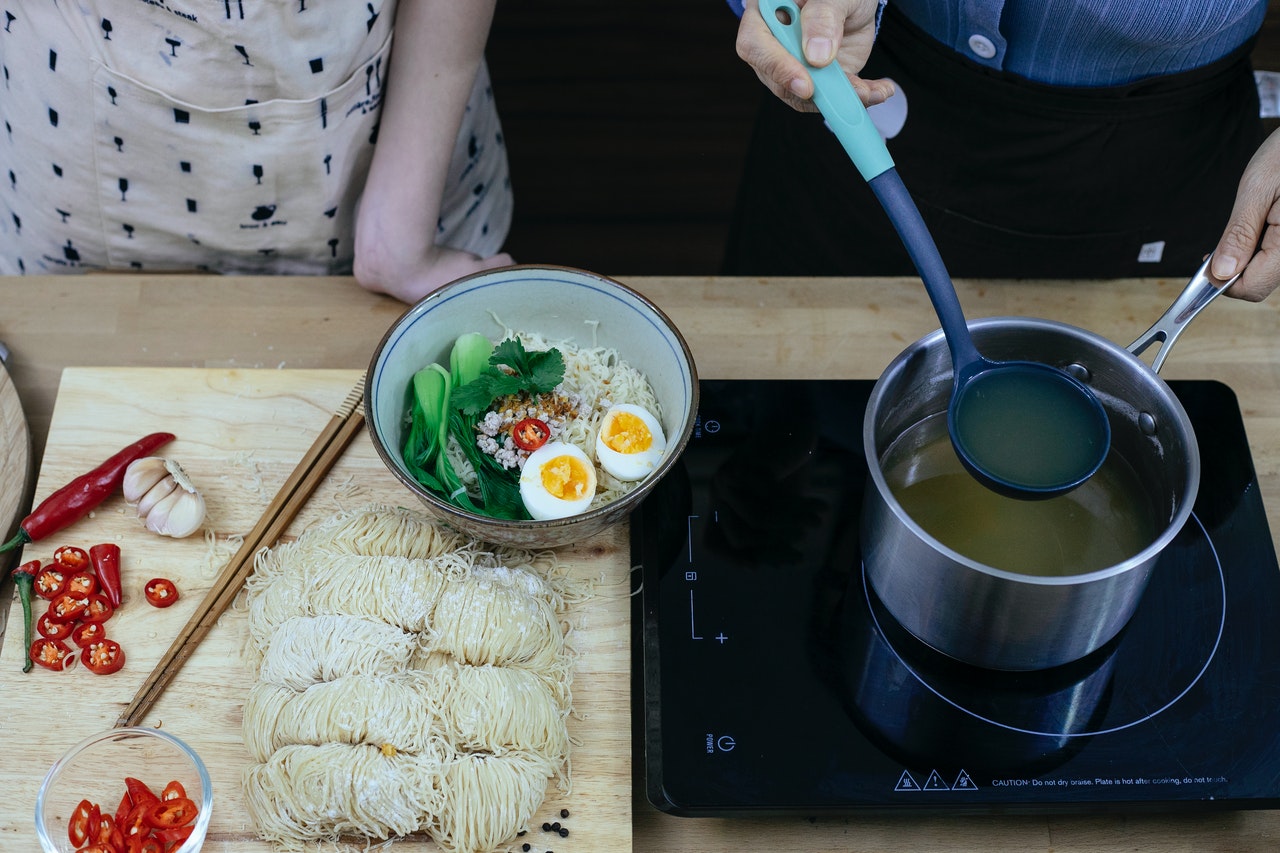
Doing A Long Broth? Consider Getting This!

A Portable Induction Cooktop – Some ramen broths only take about 3-4 hours to make and one can usually attend to a boiling pot on the stove with no problem. However, for the long broths like pork bone or pork + chicken stocks, longer boiling times are required, sometimes up to 12 hours. I love induction cooktops for the simple reason that they do not require gas and a flame to be ignited for an extended period of time. In my opinion, they’re safer and also easier to maintain a rolling boil longer without all the excess heat being emitted from a flame. All that heat originates inside the pot and stays in the pot. Keep in mind you will need steel pots that are magnetic in order to use induction cooktops.
2. Seasonings and Tare
Tare is both its own layer of flavor and an actual step in assembling a ramen bowl.

When I made my first broth I made the mistake of adding salt in the stock making process. Pre-seasoning a stock isn’t the end of the world but it does make the rest of your flavors more difficult to incorporate and customize per bowl. For example, if I salted a large batch of broth up front I couldn’t choose to season any future bowls with soy sauce (shoyu) or miso if I wanted to. Further limiting, I would not be able to add a hint of dried fish or mushroom taste to my soup which I would normally infuse into a soy sauce base because the salt from the soy sauce could push the saltiness overboard. I would be stuck with a large stock pot full of just one flavor and that’s no fun. This is why it is good to season your broth separately.
There are several seasoning bases which commonly come in the form of a thing called a tare. Tare is both its own layer of flavor and an actual step in assembling a ramen bowl. I have read that the portion is usually 1/10 tare to broth and cooks will actually ladle tare into the bowl before adding broth and noodles. However, in my experience, the best way to know the right ratio of tare to broth is to taste it.
Tare in Japanese means “sauce” and there are a few common types of seasonings when it comes to ramen.
Shio (Sea Salt)
Shio tare is a sea salt based seasoning sauce which can be made from a combination of a simple dashi (dried kombu, katsuobushi flakes and water) and a heaping helping of sea salt. This recipe can be adjusted to add other things like shitake mushrooms, but it is one of the more basic seasonings. I actually prefer this best because I love the clean taste of salt to broth. There is not much else interrupting what the broth was intended to do.
Shoyu (Japanese Soy Sauce)
Shoyu is a Japanese style soy sauce base. Since soy sauce is already salty you get to season your broth while adding a touch of soy flavor. Shoyu tare can often be combined with a variety of other flavors to give the tare a distinct taste (dried fish, garlic, mirin, etc…) but flavor at its core is the soy sauce.
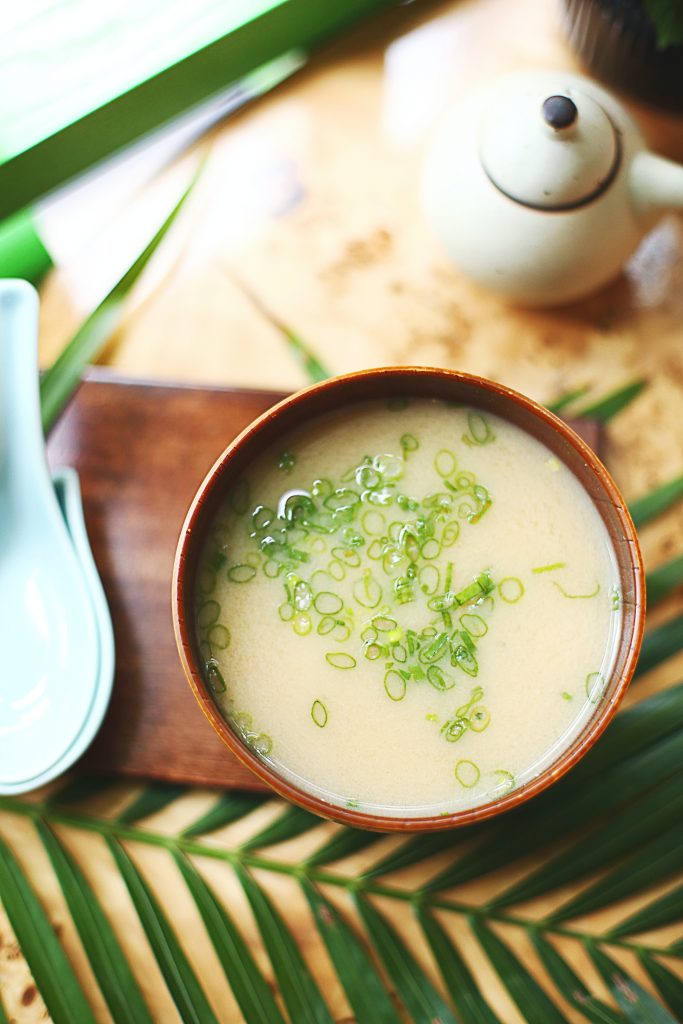
Miso (Fermented Soy Beans)
Miso (fermented soy beans) is also a common seasoning base for many ramen. There are several types of miso like red, white, hatcho or saikyo miso, and miso is inherently salty because it is preserved and fermented using large amounts of salt. To make miso tare miso paste can be used on its own or cooked with several other types of miso depending on the recipe. Some spicy miso ramen recipes call for the addition of hot chili oil and other peppers to give it both a spicy look and flavor as well.
Just like types of broth, the seasoning or type of tare you choose will define the flavor of your ramen so choose wisely… or try them all! Once you get used to the process it is good to experiment combinations and types so you’re not stuck on one kind of ramen forever.
3. Aromatic Oils
This “complexity” was the je ne sais quois that I missed on my first go around making ramen and one of the reasons I felt my first bowl fell flat.
Another layer that I did not know about when I made my first batch of ramen was the aromatic oil layer. First, it is literally a layer of oil (or fat) that supposedly traps the heat of your both in your bowl. Secondly, it is another component to the complex flavors you get from a traditional ramen experience. This “complexity” was the je ne sais quois that I missed on my first go around making ramen and one of the reasons I felt my first bowl fell flat.
It is important to know that this is also a step in ramen assembly. You may choose to add the oil to the top of your ramen as a finishing touch or include in the bottom of the bowl with the tare before pouring in your broth. Given the density of oil it will eventually collect at the top of your broth just like any fat would on water.
There is really no end to the kind of oils you can use to flavor a bowl of ramen. A few common oils include hot chili oil, black garlic oil and even plain toasted sesame oil. More unique ones I have encountered are scallion oil, shrimp oil and dried fish oil to name a few. On the complete other side of the spectrum it is even common for a pat of butter to be put on top of a traditional bowl of miso ramen.
Most of the above are made by simply infusing some highlight ingredient into a neutral oil by cooking it and letting it set for 24 hours. Others use drippings or fat from other parts of the process (pork of chicken) and infuse those with key ingredients they want to highlight. For example you can skim the chicken fat off a chilled chicken broth or cook some skins to get the oils you need. Then you can infuse the oils by cooking things like garlic and ginger in it on low heat, then set and save for assembly.
I love keeping certain infused oils handy as I have learned they’re not just handy for ramen but also cooking other dishes. I recently found out that the smoky flavor of black garlic oil tastes amazing on chili. However, when it does come to ramen, do not skip this step. The aromatic oil is a critical layer in the complex flavor profile you’re assembling in your ramen.
4. Noodles
Noodles are just as much the soul of your bowl as the broth is and it is essential to get right.
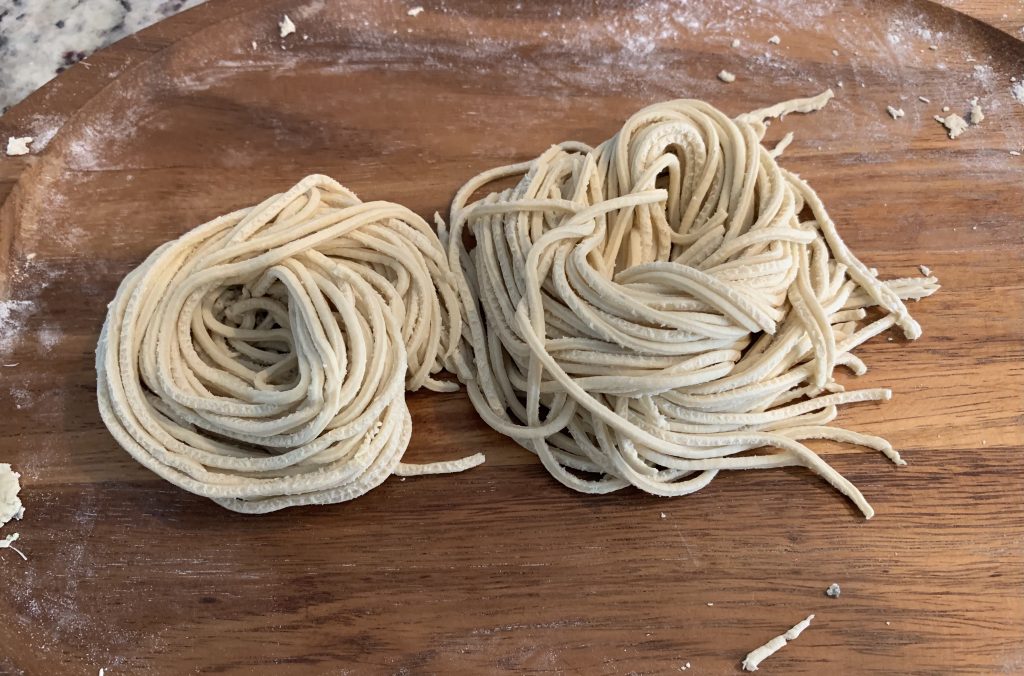
This is one of the more intuitive components of ramen but I wouldn’t underestimate the importance of choosing the right noodle to compliment your dish. Noodles are just as much the soul of your bowl as the broth is and it is essential to get right. There are some suggestions for noodle & broth combos (e.g. use low hydration noodles in thick broths and high hydration in thinner broths) but I don’t like noodle rules because I now know what I prefer having tried a variety. My advice is to try some different kinds of ramen noodles and get to find out the kinds you like in the broths you think you’ll like them. Chances are others will like them too.
When it comes to thickness my personal preference is that when I make lighter broths like a chicken or chicken/pork based broth, I prefer my noodles to be a little thicker. Again, not a rule, but my preference. I think it helps add body, flavor and chew to a broth that might be on the thiner side. Also when I make noodles from scratch they tend to be thicker simply due to the size of my pasta cutter. For thicker broths, like a pork bone broth, I may choose to use thinner noodle to even out the strong body of a thick broth. I might roll my dough out a few notches thinner before I cut them. However, the choice is yours and I recommend trying different combinations, or at least paying attention to them when you order at a restaurant.
Other key aspects of noodles are the taste, texture and chew. If you are buying store bought noodles I suggest buying a few kinds to see what you like. Some have a more salty/alkaline taste, others a little more bland but still good. When it comes to texture a lot of the instant ramen we eat is wavy. I love this kind so I usually buy this type of noodle and they are usually packaged fresh. I have also bought ramen noodle brands that come dry and cook straight like spaghetti, and while not bad, it is not always my preference.
A lot of texture and chew is determined by the way you cook the noodles too. It is common that chewy noodles are the preference in ramen “culture”, so much that chefs encourage patrons to eat immediately as it is best served both hot and chewy. At home, noodles should cook a very short while (1-3 minutes) in order to retain some chew and to not overcook. Whether you like chewy or softer noodles, just know too that your noodles continue to cook in your broth when you assemble, so either eat ASAP or use it your advantage.
I don’t have many reminders on proper noodle making at home other than don’t forget to use baked baking soda (sodium bicarbonate) to get the salty/alkaline taste that is most common to ramen noodles. It also gives your noodles that distinct yellow color we are so accustomed to. For anyone on the fence about making their own ramen noodles, it usually only takes 3-4 ingredients: flour, salt, water and baking soda. Buying a pre-made Japanese kansui alkaline solution can replace the water + baking soda solution and makes it that much easier. I encourage you to give it a try, even just once. There are great recipes out there, like this great basic ramen noodle recipe from Serious Eats. You can do it!
Making your own noodles? Don’t forget these!
If you are delving into making your own noodles you’ll want to research a few pieces of equipment if you don’t already own some of these. I went the first six years of home made noodle making without buying the first two items and I wish I had known earlier!

A kitchen scale – One of the most handy things you can have in your kitchen when it comes to lots of things from noodle making to baking. Flour and water ratios are key and a scale is going to give you the precision you need to follow certain recipes correctly.

A noodle strainer – Trust me, I’ve tried using tongs and small sieve baskets (with handles) to scoop out loosely floating noodles in a large pot, and it can be difficult. Noodle strainers hang off the edge of the pot can stand straight up with their bottoms submerged in boiling water. This is perfect for cooking your noodles in the strainer so you can easily remove them and drain them without having to fish for loose noodles or dumping out your entire pot.

A Pasta Roller / Cutter or the Kitchen Aid Stand Mixer add on Equivalent – Rolling ramen noodles is hard with a simple kitchen roller and getting them cut thinly and evenly can be done with a knife, but takes some serious skill. Honestly, at any level it is great to have a pasta machine to do the rolling and noodle cutting for you. If you can, there are plenty of third-party Kitchen Aid add ons that make this process even easier by automating the cranking.
If you are strapped for time and cannot make your own noodles or cannot find fresh pre-made noodles at your grocery store, there is no shame in tossing the flavor packet and using instant noodles. Just remember – don’t cook them too long!
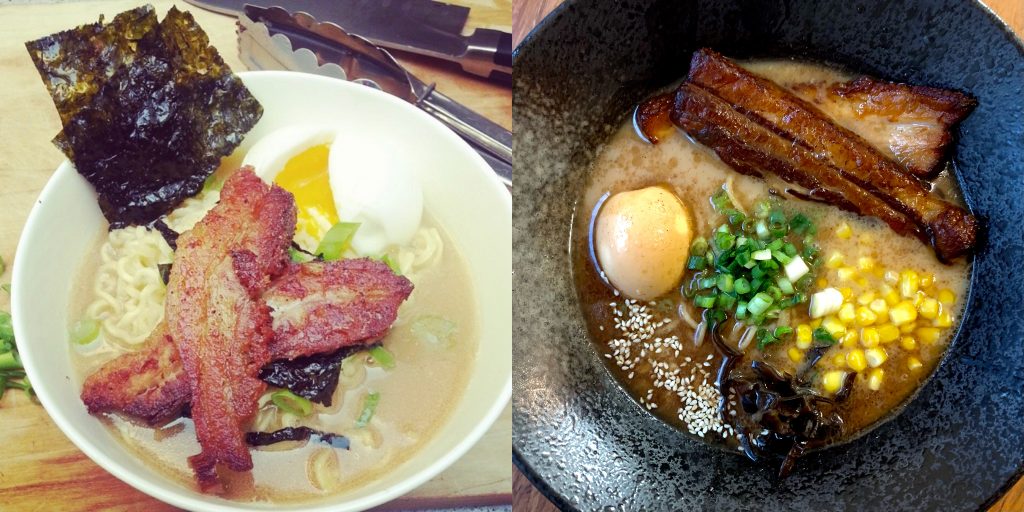
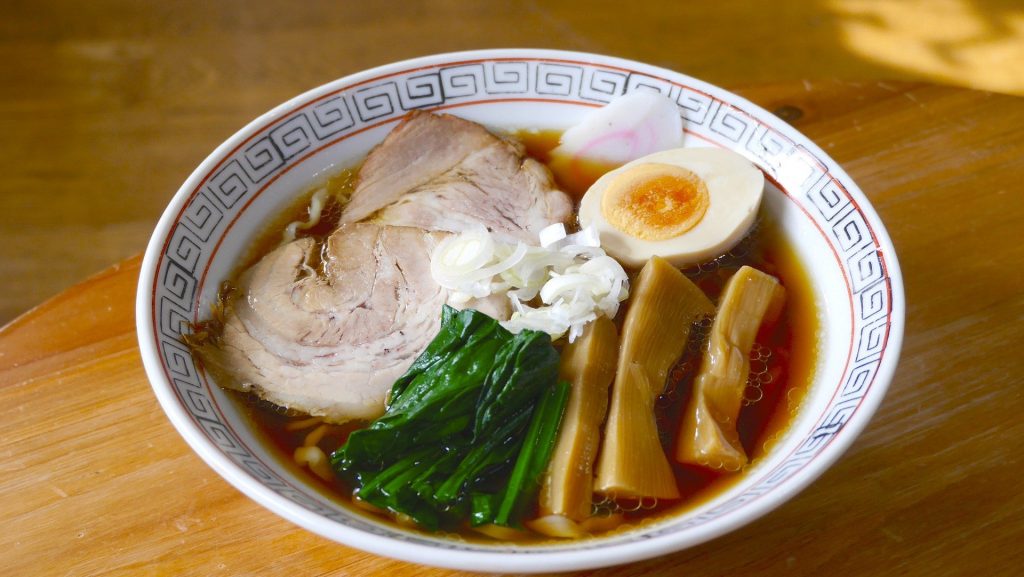
5. Toppings
The beauty of ramen toppings is you can let your creativity run wild.

Toppings are arguably what sets ramen noodle soup apart from most other noddle soups. In ramen culture both in Japan and abroad ramen toppings span both the simple and elaborate. There’s really nothing wrong with topping noodles with chopped scallions and fried garlic and calling it a day. Yet there is also something magical about an elaborate showcase of textures, colors and flavors you can get from the right topping combination.
I won’t go too deep into how to make each topping here, but you can read my guide on how to spruce up instant ramen because actually a lot of those toppings are the exact same ones restaurants use and that you may choose to add onto your homemade bowl. However, here are some thought starters:
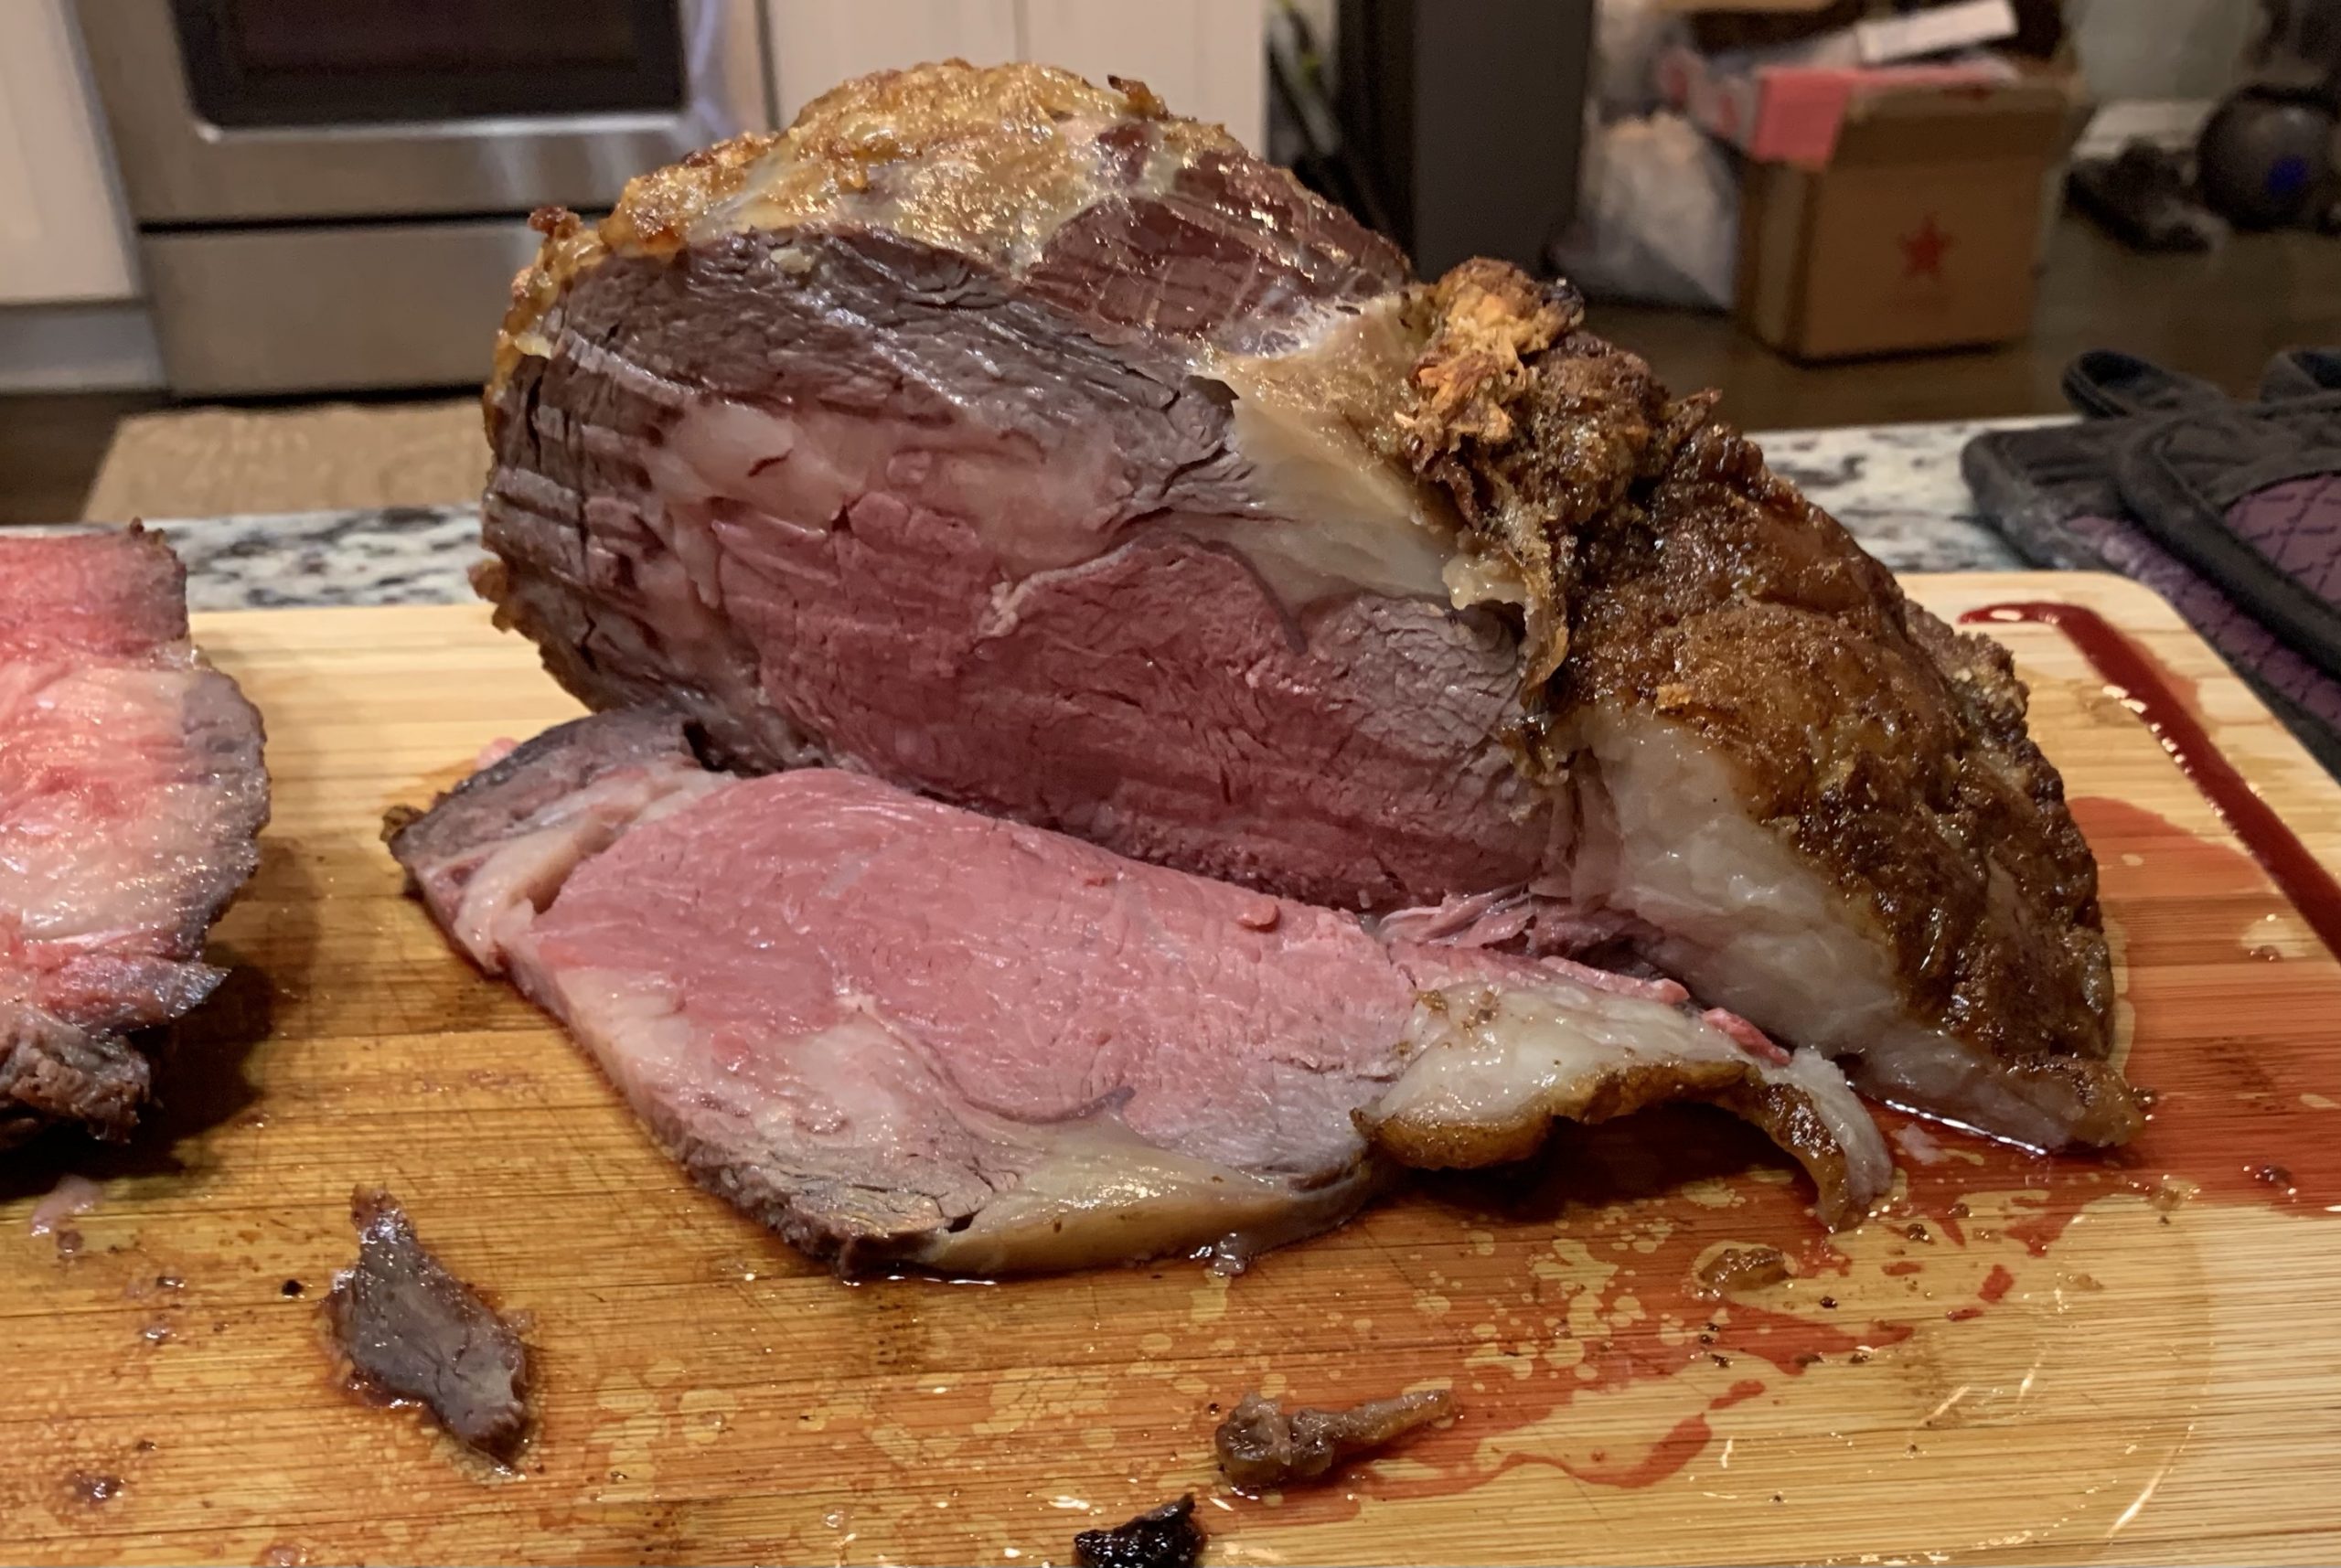
Proteins
- Chashu pork / braised pork belly
- Pulled marinated chicken breast
- Cooked whole shrimp
- Grilled or pulled salmon fillet
- Soft boiled or seasoned egg (ajitsuke tamago)
Veggies
- Scallions
- Fried garlic or shallots
- Mushrooms (shitake, enokitake, wood ear / black fungi)
- Bean sprouts
- Leeks
- Corn
- Menma (seasoned bamboo shoots)
- Nori (chopped or whole)
- Baby bok choy
Other Common Toppings
- Toasted Sesame Seeds
- Naruto (Japanese fish cake)
- Shichimi Togarashi (Japanese 7-spice seasoning)
- A pat of butter
- More aromatic oils like black garlic or chili oil
Example Combinations
On Shio Tonkotsu: Pork + nori + scallions + naruto + seasoned egg
On Spicy Miso: Chicken + black fungi + menma + corn + scallions + butter + hot chili oil
On Shoyu: Pork + bean sprouts + corn + naruto + seasoned egg + togarashi + black garlic oil
The beauty of ramen toppings is you can let your creativity run wild. There are some traditional routes but there are also many ways you can branch to create your own signature combinations. Just go to any two ramen restaurants and compare their menus. You may find some themes, but you will likely also find different combinations of toppings and types of broths that make it their own.
Want some extra inspiration?
I joined a Facebook Group called “Ramen Junkies” where everyone shares about their latest bowls. Lots of great topping ideas pop up with a few being outside the box!
Good Ramen Requires Planning
Congratulations! Now you have the basic components down. It is time to consider how you plan to put it all together. Keep in mind, assembling a great bowl of homemade ramen requires very good planning. This is key for two reasons:
1. You will need a lot of prep time
A lot of seemingly simple components take a bit of time to make. For example, preparing sliced pork belly requires you to braise the pork for several hours. Kombu needs to soak 10 hours before making Shio tare. An ajitsuke tomago takes 7 minutes to boil but possibly 24 hours to marinade. Even chopping green onions or rehydrating dried mushrooms will take you time. If you want to get some of your toppings just right, you need to plan it out and prep them all ahead of time.
2. Assembly must be quick!
The second reason to plan ahead is you do not want to spend much time assembling your bowl while your noodles are sitting in your broth. It is best to get all components in within minutes of each other. That means you want ZERO prepping of ingredients during the assembly process.
Ramen is best served hot and immediately. Wait too long and your noodles may get soft or your broth cold. When you are finally ready to serve, having your “station” laid out so you can pick and choose what to put on will make this step easier.
My suggestion for any first-timer is make a menu either on paper or in your head. Treat it like you were at a restaurant looking at the various ways you can customize your bowl.
Whether you’re cooking for 1-2 or a group, decide what elements you want to go with and prepare them all ahead of time. As we just explored, the component possibilities are endless. To make it simple I suggest you put a limit on what you will make (i.e. one kind of broth, one type of tare, 1-2 kinds of aromatic oils, and 3-4 toppings). Once you get more advanced and add more components on your repertoire, then you can get fancy.

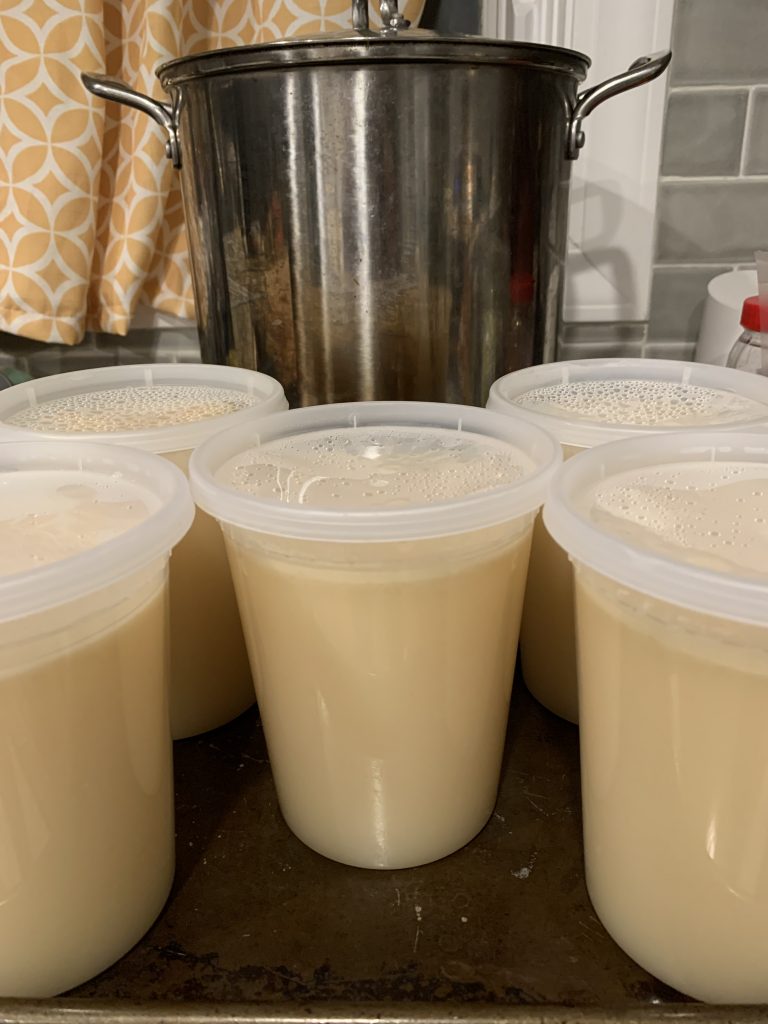
Whether you go down the route of using your ramen components in one night or making enough to rotate over time, make sure you have enough containers to store them. At one point I had a bunch of old take out containers that I used to store things, but they all varied in size and shape.
Recently, I purchased a set of plastic deli containers for easy storage just for this process. I like them a lot because they nest when not in use and stack well when in use. They are clear so you can see inside them, and they are also perfect for soup when you want to take it on the go or share your creations with friends (most are leak proof). Also, they are made of flexible plastic which is exactly what you need when freezing batches of broth to use later.
Go Forth and Make Ramen!
There you have it, the five basic components of ramen: broth, tare, aromatic oils, noodles, and toppings. Now that you have a understanding of each layer that goes into a bowl of ramen you can dive right into making your own and not miss a single step in the process. If anything, I hope knowing the complexity of each component and how they come together in harmony within a bowl of ramen helps you appreciate just how amazing this unique dish is. Enjoy!
This is awesome! Please keep writing great content.